Каждую неделю наша служба поддержки клиентов в Фошане получает десятки звонков от покупателей, которые заказали неправильный размер cane webbing 1. Разочарование реально — материалы тратятся впустую, проекты останавливаются, а расходы растут. Первопричина почти всегда одна и та же: неправильное измерение перед заказом.
Чтобы измерить замену ротанговой сетки, измерьте проем от внешнего края канавки с одной стороны до внешнего края с противоположной стороны. Затем добавьте 1-2 дюйма с каждой стороны для нахлеста. Также измерьте ширину канавки, чтобы выбрать правильный размер шнура.
Получить правильные размеры проще, чем большинство людей думают, но каждый шаг имеет значение. Это руководство проведет вас через каждую деталь — от чтения канавки до уверенного размещения заказа. Давайте начнем с каркаса мебели 2 itself.
Как точно измерить каркас мебели для замены ротанговой оплетки?
Один урок, который мы усвоили рано, отправляя ротанговую тесьму на мебельные фабрики в США и Австралии, заключается в том, что измерения "достаточно близко" вызывают наибольшее количество возвратов. Точность экономит деньги и время, каждый раз.
Чтобы точно измерить каркас вашей мебели, поместите рулетку поперек сиденья от внешнего края одной канавки до внешнего края противоположной канавки. Запишите ширину и длину в самых широких точках. Для неправильных форм измеряйте в нескольких местах и используйте наибольший размер.

Пошаговое измерение каркаса
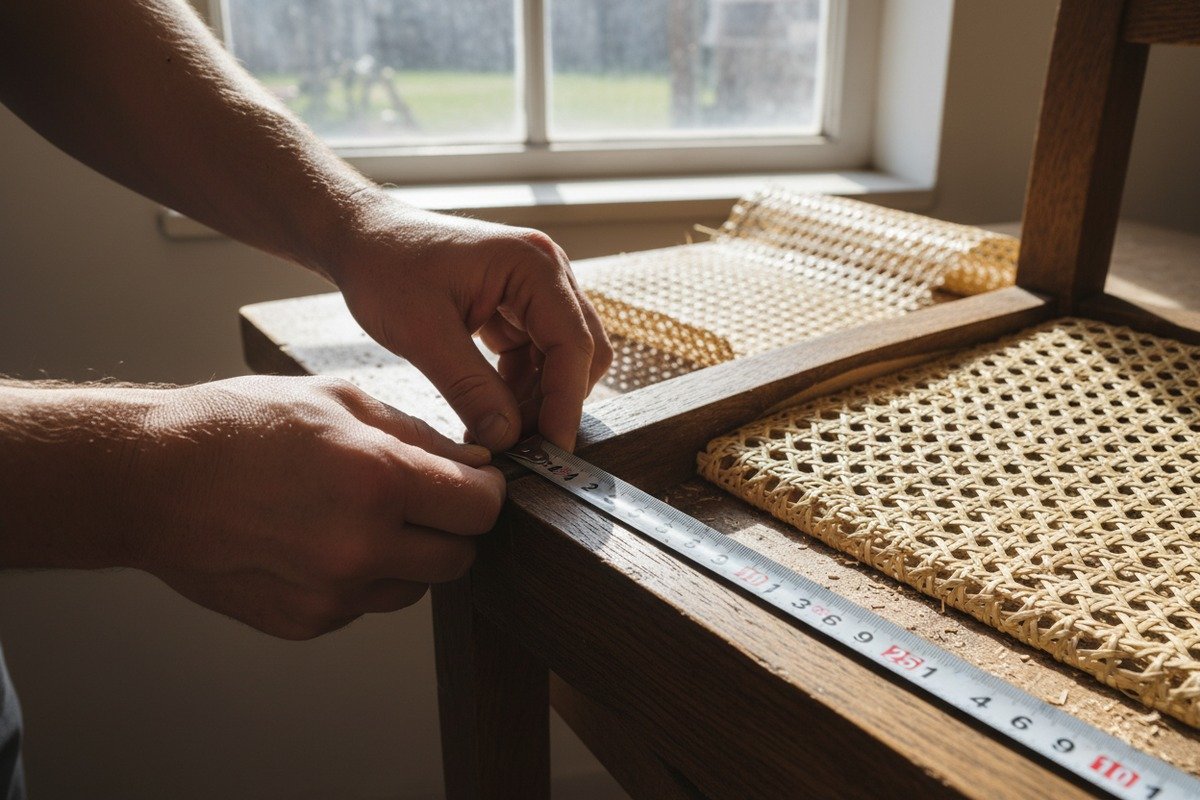
Прежде чем взять в руки рулетку 3, осмотрите каркас стула. Ищите структурные проблемы — ослабленные соединения, трещины или гниль. Ослабленный каркас не сможет должным образом удерживать новую тростниковую тесьму. Подтяните любые ослабленные соединения. Заполните небольшие трещины древесной шпаклевкой и дайте ей высохнуть. Этот шаг легко пропустить, но он предотвратит разочарование в будущем.
Теперь возьмите гибкую рулетку или стальную линейку. Поместите один конец на внешний край канавки с левой стороны сиденья. Растяните ее до внешнего края канавки с правой стороны. Запишите это число. Это ваша ширина. Повторите тот же процесс спереди назад. Это ваша длина.
Почему следует измерять от внешнего края канавки
Некоторые руководства говорят измерять от шпунта до шпунта. Другие говорят от внутреннего края канавки. Здесь, на нашем производственном предприятии, мы рекомендуем метод измерения от внешнего края канавки, потому что он дает вам самую надежную базовую линию. Тесьма должна покрывать все отверстие и заходить в канавки с обеих сторон.
Если ваше сиденье имеет трапециевидную форму — шире спереди и уже сзади — всегда записывайте самую широкую точку для каждого направления. Излишки вы обрежете во время установки. Гораздо лучше иметь немного больше материала, чем недостаточно.
Особые случаи: круглые и неправильные сиденья
Круглые или овальные сиденья требуют другого подхода. Измерьте диаметр в самой широкой точке. Для действительно неправильных форм лучший метод — создать бумажный шаблон. Положите большой лист бумаги на сиденье. Обведите линию канавки карандашом. Затем этот шаблон можно измерить в плоском виде на столе. Вы даже можете отправить шаблон своему поставщику для подтверждения.
| Форма сиденья | Метод измерения | Ключевой совет |
|---|---|---|
| Прямоугольный | От паза до паза, ширина × длина | Измеряйте в самых широких точках |
| Трапециевидный | Ширина спереди, ширина сзади, длина | Используйте самую широкую переднюю ширину |
| Круглый | Диаметр в самой широкой точке | Добавьте напуск к диаметру |
| Неровный | Шаблон из бумаги | Отправьте шаблон поставщику |
Прессованная плетенка против плетенки, сплетенной вручную
Крайне важно знать, какой тип плетенки используется в вашем стуле. Прессованная ротанговая сетка 4 сидит в пазу и удерживается шнуром. Плетеная из нитей ротанга, вплетенная вручную, пропускается через отдельные отверстия, просверленные в раме. Метод измерения совершенно разный для каждого.
Для плетеная из нитей ротанга, вплетенная вручную 5, вы не измеряете пазы. Вместо этого подсчитайте количество отверстий в пределах 6-дюймового участка вдоль одной стороны рамы. Количество отверстий определяет калибр нити. Например, менее 12 отверстий на 6 дюймов обычно указывает на более тонкий ротанг. Также измерьте расстояние от центра одного отверстия до центра следующего. Расстояние в ½ дюйма от центра до центра обычно соответствует популярному размеру Fine ½" восьмиугольный узор плетения 6.
Путаница между этими двумя методами — одна из самых распространенных ошибок покупателей, особенно при работе с круглыми сиденьями, где чаще всего используется плетеный вручную ротанг.
Сколько дополнительной тростниковой сетки мне следует включить в мой заказ для установки?
Когда мы готовим образцы для новых оптовых клиентов, одно из первых, что мы объясняем, — это запас на нахлест. Недостаточный заказ — основная причина неудачной установки, и он превращает простой ремонт в разочаровывающий цикл повторных заказов.
Вам следует добавить как минимум 1-2 дюйма дополнительной тростниковой сетки с каждой стороны вашего измерения от паза до паза. Это означает добавление 2-4 дюймов в общей сложности к ширине и длине. Дополнительный материал позволяет вдавить сетку в паз и аккуратно обрезать излишки после установки.

Почему запас на нахлест важен
Ротанговая сетка не просто лежит поверх рамы. Ее необходимо вдавить в паз со всех четырех сторон, прежде чем шнур зафиксирует ее на месте. Если сетка будет обрезана точно по размеру от паза до паза, у вас не хватит материала, чтобы ухватиться и вдавить ее в канал. Дополнительные 1-2 дюйма с каждой стороны дают вам рабочий край.
Вот реальный пример. Предположим, ваш размер от паза до паза составляет 13,5 дюйма в ширину и 14 дюймов в длину. Вы добавите минимум 2 дюйма к каждому измерению, получив 15,5 дюйма в ширину и 16 дюймов в длину. Поскольку стандартные ширины рулонов поставляются с определенными шагами, вы округлите до ближайшей доступной ширины — в данном случае до 16 дюймов.
Стандартные ширины рулонов и округление вверх
Ротанговая сетка не обрезается на заказ до точного дюйма для каждого заказа. Она продается стандартными ширинами 7. Когда рассчитанное вами измерение попадает между двумя стандартными размерами, всегда округляйте в большую сторону.
| Расчетная необходимая ширина | Ближайшая стандартная ширина рулона | Действие |
|---|---|---|
| 13.5" | 14" | Округлите до 14" |
| 15,5" | 16" | Округлите до 16" |
| 19" | 20" | Округлите до 20" |
| 25" | 30" | Округлите до 30" |
| 33" | 36" | Округлите до 36" |
Стандартные ширины у большинства поставщиков — включая наши собственные рулоны — бывают 12", 14", 16", 18", 20", 24", 30", 36" и 48". Длина обычно продается погонными футами или в рулонах по 50 футов для крупных заказов.
Соображения по замачиванию и усадке
Натуральная ротанговая циновка 8 необходимо замочить в теплой воде перед установкой. Это делает его гибким и легким для укладки в паз. Однако после высыхания он немного стягивается. Это на самом деле полезно — создает натянутую, барабанную поверхность. Но это также означает, что вы никогда не должны слишком сильно растягивать тесьму во время влажной установки. Предусмотрите небольшое естественное стягивание.
В условиях высокой влажности рассмотрите возможность начальной установки с небольшим натяжением. Влага может привести к тому, что материал со временем расслабится. Более тугая начальная точка помогает противодействовать возможному будущему провисанию.
Сколько шнура вам нужно?
Распространенная ошибка — забыть заказать достаточное количество шпунта из тростника 9. Измерьте общую длину канавки по всему периметру сиденья. Добавьте около 10% дополнительно для углов и нахлестов. Типичное сиденье обеденного стула требует примерно 6 футов шнура. Всегда заказывайте немного больше, чем вы думаете, что вам нужно. Шнур недорогой, а его нехватка в середине установки — настоящая головная боль.
Какие размеры мне нужно предоставить моему оптовику, чтобы убедиться, что я получу правильную ширину рулона?
За годы поставок тростниковой сетки оптовым покупателям по всей Нидерландам, Испании и Ближнему Востоку мы обнаружили, что четкое указание трех ключевых размеров устраняет почти все ошибки при заказе. Отправка расплывчатых измерений приводит к неправильным поставкам и дорогостоящим задержкам.
Предоставьте вашему оптовому поставщику три измерения: ширину от паза до паза плюс нахлест, длину от паза до паза плюс нахлест и ширину канавки паза. Также укажите необходимый вам тип плетения. Эти четыре детали гарантируют, что вы получите правильную ширину рулона, соответствующую длину и подходящий размер шнура.

Три основных размера
Давайте разберем это просто.
Размер 1: Общая необходимая ширина. Это ваше измерение ширины от канавки до канавки плюс запас на нахлест. Если ширина от канавки до канавки составляет 17 дюймов, а вы добавляете 2 дюйма на нахлест, общая необходимая ширина составит 19 дюймов. Затем вы закажете рулон шириной 20 дюймов.
Размер 2: Общая необходимая длина. Тот же расчет применяется к длине. Если вы заказываете для нескольких стульев, умножьте длину на стул на количество стульев и добавьте небольшой запас. Например, для шести стульев, каждому из которых требуется 16 дюймов длины, потребуется 96 дюймов, или 8 футов. Закажите 9 или 10 футов, чтобы учесть отходы при резке.
Размер 3: Ширина канавки. Это определяет размер вашего шнура. Мы подробно рассмотрим это в следующем разделе.
Указание узора плетения
Тростниковая сетка бывает разных узоров. Самый распространенный — классическое открытое шестиугольное плетение, иногда называемое "радио-плетение". Существует также более плотное квадратное плетение «корзинка» и более сложные ромбовидные узоры. При заказе укажите узор по названию или, что еще лучше, отправьте фотографию существующей сетки вашему поставщику.
Узор Fine ½" является одним из самых популярных для реставрации винтажных стульев. "½ дюйма" относится к расстоянию от центра до центра отверстий в сотовом узоре. Если ваша старая тесьма имеет такой узор, точное соответствие ему гарантирует реставрацию, соответствующую эпохе.
Оптовые заказы для нескольких изделий
Если вы являетесь мебельной фабрикой или оптовым поставщиком материалов, закупающим большие объемы, экономика меняется. Стандартные рулоны длиной 50 футов фиксированной ширины являются наиболее экономичным вариантом. Укажите общую погонную длину, необходимую для каждой категории ширины.
| Информация для предоставления | Пример | Почему это важно |
|---|---|---|
| Ширина от паза до паза + нахлест | 17" + 2" = 19" → заказать рулон 20" | Обеспечивает правильную ширину рулона |
| Длина от паза до паза + нахлест | 14" + 2" = 16" на стул | Определяет длину на единицу |
| Количество изделий | 6 стульев | Рассчитывает общую длину рулона |
| Ширина канавки паза | 3/16" | Определяет размер шпонки (#8) |
| Узор плетения | Fine ½" открытый шестиугольный | Обеспечивает эстетическое соответствие |
| Тип материала | Натуральный или отбеленный ротанг | Соответствует существующему декору |
Фотографии экономят всем время
Наш совет каждому покупателю: сделайте четкие фотографии сиденья стула сверху, крупным планом канавки и существующего плетения. Отправьте их вместе с вашими размерами. На нашем складе в Фошане наша команда контроля качества может сопоставить фотографии с вашими цифрами и выявить несоответствия до отправки заказа. Этот простой шаг помог бесчисленному количеству клиентов избежать получения неправильного продукта.
Также подумайте, нужен ли вам натуральный, отбеленный или синтетический ротанговый шнур. Натуральный ротанг имеет теплые бежевые и соломенные оттенки с органическими вариациями. Отбеленный ротанг светлее и более однородный. Синтетический ротанг, изготовленный из прочного пластика, имитирует внешний вид натуральных волокон, но устойчив к влаге и УФ-излучению. Каждый тип имеет различные характеристики толщины, которые могут повлиять на совместимость шнура.
Как измерить ширину канавки, чтобы подобрать соответствующий ротанг и шнур?
На нашем предприятии по переработке ротанга в Индонезии каждая партия шнура калибруется по стандартным размерам канавок. Но шнур может выполнять свою функцию только в том случае, если вы правильно измерите канавку с вашей стороны. Слишком тонкий шнур выпадает. Слишком толстый шнур трескает раму.
Чтобы измерить ширину паза, сначала очистите его от старых фрагментов шпона, клея и тростника. Затем используйте штангенциркуль, линейку или метод складывания монет, чтобы определить внутреннюю ширину паза. Сопоставьте эту ширину с соответствующим номером размера шпона, используя стандартную таблицу. Никогда не измеряйте старый шпон — всегда измеряйте сам паз.

Подготовка канавки к измерению
Этот шаг является обязательным. Вы не можете измерить канавку, заполненную старым материалом. Используйте плоскую отвертку, долото или специальный инструмент для очистки канавок, чтобы удалить все остатки старого шнура. Соскребите засохший клей. Вытащите все фрагменты ротанга, застрявшие в канавке. Чистая канавка дает точное показание.
Не торопитесь здесь. Старый клей может сделать канавку уже, чем она есть на самом деле. Проведите инструментом по всему периметру канавки. Проверьте наличие участков, где дерево откололось или расширилось — неровные канавки встречаются чаще, чем вы можете ожидать, особенно на винтажной мебели.
Метод складывания монет
Не у всех есть штангенциркуль. Это нормально. Метод с монетами удивительно точен и стал самым популярным методом среди мастеров по реставрации своими руками. Вот как это работает.
Сложите монеты стопкой и найдите комбинацию, которая плотно войдет в паз. Сопоставьте стопку с приведенной ниже таблицей.
| Комбинация монет | Примерная ширина | Размер шпонки |
|---|---|---|
| 2 десятицентовика + 1 пенни | 5/32" (прибл. 4 мм) | #7 |
| 2 никеля + 1 десятицентовик | 3/16" (прибл. 4,8 мм) | #8 |
| 3 никеля | 7/32" (прибл. 5,5 мм) | #9 |
| 2 никеля + 3 десятицентовика | 9/32" (прибл. 7,1 мм) | #10 |
Этот метод использует монеты США. Если вы находитесь за пределами США, наиболее надежной альтернативой является цифровой штангенциркуль. Даже недорогой штангенциркуль из хозяйственного магазина даст вам показания с точностью до 1/100 дюйма.
Измеряйте в нескольких точках
Вот что часто упускают в руководствах: пазы не всегда равномерны. Дерево расширяется и сжимается десятилетиями. Соединения смещаются. Паз может быть 3/16 дюйма спереди и 7/32 дюйма сзади. Измерьте как минимум четыре точки — спереди, сзади, слева и справа. Если показания различаются, используйте наиболее распространенное измерение. Если два размера кажутся одинаковыми, выберите немного более крупную шпонку и нанесите немного больше клея, чтобы компенсировать.
Выбор правильного клея
При установке новой шпонки используйте ПВА клей для дерева 10 или клей для рукоделия, который высыхает прозрачным. Нанесите тонкую ровную линию внутри паза, прежде чем вставлять шпонку. Избегайте клеев, оставляющих темные пятна — они могут просочиться сквозь натуральное плетение из ротанга и оставить видимые следы. Дайте клею высохнуть в течение полных 24 часов перед использованием стула.
Почему никогда не следует измерять старую шпонку
Старая шпонка со временем сжимается. Она высыхает, уменьшается в размерах и деформируется. Если вы измерите старую шпонку и закажете этот размер, новая шпонка, скорее всего, будет слишком мала для паза. Всегда измеряйте сам паз. Это одно из тех правил, которое кажется незначительным, но имеет огромное значение для конечного результата.
На углах будьте особенно осторожны при установке. Шпонка может треснуть, если вы будете проталкивать ее по крутому радиусу. Для острых углов разрежьте шпонку под углом 45 градусов и соедините два куска встык. Нанесите дополнительный клей на стык. Этот метод обеспечивает чистый вид и надежное крепление.
Записывайте свои измерения для будущих заказов
Если вы реставрируете несколько стульев или планируете выполнять другие проекты в будущем, ведите письменный учет ширины паза, схемы плетения и размера шпонки для каждого предмета. Это значительно экономит время при повторных заказах. Многие из наших оптовых клиентов ведут простую таблицу с номерами моделей стульев, размерами пазов и соответствующими спецификациями шпонки и плетения. Это небольшая привычка, которая окупается неоднократно.
Заключение
Точное измерение — основа каждой успешной замены ротангового плетения. Измерьте свои пазы, добавьте соответствующий нахлест и четко общайтесь с поставщиком, чтобы получить нужный материал с первого раза.
Сноски
1. Объясняет, что такое ротанговое плетение, его виды и применение в мебели. ↩︎
2. Подробно описывает виды древесины и методы изготовления каркасов мебели. ↩︎
3. Предоставляет основные приемы и советы по точному использованию рулетки. ↩︎
4. Различает прессованный и плетеный вручную ротанг, описывая его характеристики и применение. ↩︎
5. Объясняет плетеный вручную ротанг, его характеристики и особенности ремонта. ↩︎
6. Иллюстрирует и описывает различные традиционные и декоративные узоры плетения ротанга. ↩︎
7. Приводит примеры стандартных ширин тростниковой сетки, доступных для покупки. ↩︎
8. Объясняет характеристики натуральной тростниковой сетки и ее отличие от синтетической. ↩︎
9. Определяет тростниковую рейку и ее функцию в креплении тростниковой сетки. ↩︎
10. HTTP 404 ↩︎

