Every week on our production floor in Foshan, we process hundreds of meters of ротанговая сетка 1—and we’ve seen plenty of costly cutting mistakes from clients who didn’t know a few simple tricks.
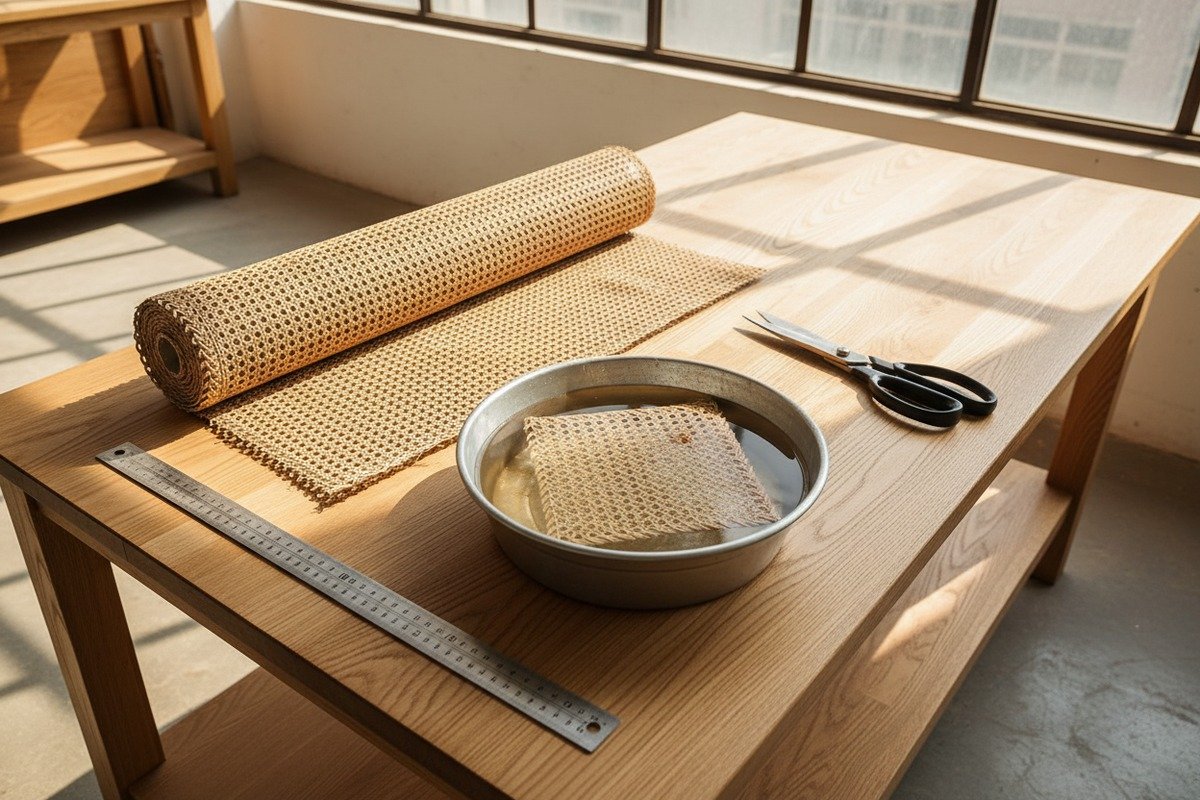
The best tips for cutting natural rattan cane webbing include soaking it in warm water for 15–30 minutes before cutting, using sharp scissors or a fresh utility knife, adding 2–4 inches of extra material on all sides, and finishing raw edges with glue, spline, or trim to prevent fraying and fiber damage.
Whether you run a furniture factory or you’re sourcing rattan rolls for wholesale distribution, getting clean cuts saves material and time Low-VOC Adhesives 2. Below, we break down the tools, techniques, and precautions that matter most.
What tools should I use to cut my rattan cane webbing without damaging the fibers?
We ship rattan webbing to furniture factories across more than a dozen countries, and the single most common complaint we hear traces back to one root cause: dull cutting tools.
Use sharp, heavy-duty scissors for flat sheet webbing, a fresh utility knife or craft knife for straight cuts along a ruler, and a fine-tooth saw for thicker or layered pieces. Sharp tools create clean edges, while dull blades crush and fray the natural rattan fibers.

Why Sharpness Matters More Than Tool Type
Rattan cane is a natural plant fiber 3. Each strand in the weave has a hard, glossy outer skin and a softer, porous inner core. A dull blade doesn't slice through the outer skin cleanly. Instead, it crushes the fiber and pulls at the weave, creating a ragged edge that unravels over time. We always tell our clients: a cheap pair of brand-new scissors will outperform an expensive pair of dull shears every single time.
Matching the Tool to the Job
Not every rattan project calls for the same tool. Here's a quick reference we share with our wholesale buyers:
| Tool | Best For | Skill Level | Pros | Cons |
|---|---|---|---|---|
| Heavy-duty scissors 4 | Flat sheet webbing, panel inserts | Beginner | Affordable, easy to control, no power needed | Slower on thick material |
| Utility knife + metal ruler | Straight cuts on rolls | Beginner–Intermediate | Very precise straight lines | Not ideal for curves |
| Fine-tooth hand saw | Thick or layered webbing, intricate shapes | Intermediate | Handles dense material well | Requires steady hand |
| Rotary cutter + cutting mat | Long, straight production cuts | Intermediate | Fast, consistent pressure | Needs self-healing mat |
| Router (power tool) | Cutting channels in frames for spline | Advanced/Professional | Extremely precise grooves (5/16-inch) | Expensive, steep learning curve |
A Practical Test Before You Start
Before cutting into your main sheet of rattan webbing, always do a test cut on a scrap piece. This tells you whether your blade is sharp enough and whether the material needs soaking first. Place the webbing porous-side down on a self-healing cutting mat 5. Make one firm, confident cut. If the fibers separate cleanly and the weave pattern stays intact near the edge, you're ready. If you see loose strands or crushed fibers, swap to a sharper blade.
Hand Tools vs. Power Tools
There is an ongoing debate among furniture makers. Some professionals insist on using a router to cut channels and trim excess webbing during installation. Others prefer the simplicity and control of hand tools. In our experience supplying both small workshops and large-scale factories, hand tools work perfectly for most webbing cutting tasks. Power tools like routers are only necessary when you're cutting grooves into wooden frames—not for cutting the webbing itself. For the webbing, stick with scissors or a knife.
How can I prevent the edges of my natural rattan from fraying after I cut it?
When we first started exporting rattan webbing rolls to European furniture wholesalers, edge fraying was the number one issue raised during quality inspections. It took some problem-solving, but the solutions are straightforward.
To prevent fraying, apply a thin line of clear-drying glue (such as wood glue or PVA) along the cut edge immediately after cutting, secure the edge with spline or staples during installation, or conceal it with a binding strip of narrow 4mm cane. Trimming excess only after the webbing has dried and tightened also reduces fraying risk significantly.

Understanding Why Rattan Frays
Rattan cane webbing is woven from individual strands. When you cut across those strands, you sever them mid-weave. Without something holding those cut ends in place, they naturally loosen and separate. This is not a defect in the material—it's simply how woven structures 6 behave. The key is to manage those cut ends before they become a problem.
Three Proven Edge-Finishing Methods
Here are the methods we recommend to our clients, ranked by ease of use:
Method 1: Clear Glue Line
Run a thin bead of PVA or clear wood glue 7 along the cut edge. Let it dry fully before handling. This bonds the cut fiber ends together and prevents unraveling. It's invisible once dry. This is the fastest method and works well for panels, cabinet inserts, and decorative projects.
Method 2: Spline and Channel Installation
If you're installing webbing into a routed groove in a wooden frame (such as a chair seat or door panel), the spline itself holds the edges in place. Press the webbing into the 5/16-inch channel and tap the spline in with a mallet. The mechanical pressure locks the fibers. No glue is needed on the cut edge in this case, though some builders add it for extra security.
Method 3: Binding with Narrow Cane
For visible edges on furniture—like the rim of a chair seat—wrap the cut edge with a 4mm binding cane strip. This traditional finishing method hides the raw edge completely and adds a polished, professional look.
When to Trim Excess
One mistake we see repeatedly: trimming excess webbing right after installation, while it's still damp. Rattan shrinks as it dries. If you trim it flush when wet, it may pull away from the frame as it contracts. Wait 24–48 hours. Let the webbing dry and tighten. Then trim the excess with a sharp chisel or knife. The result is a snug, fray-free edge.
| Edge-Finishing Method | Difficulty | Visibility | Best Use Case |
|---|---|---|---|
| Clear glue line | Easy | Invisible when dry | Panels, cabinet doors, decorative inserts |
| Spline in routed channel | Умеренная | Hidden inside groove | Chair seats, door panels, frame installations |
| 4mm binding cane strip | Moderate–Advanced | Visible, decorative | Chair rims, exposed furniture edges |
| Staples + trim molding | Easy | Covered by molding | Radiator covers, room dividers, wall panels |
A Note on Low-VOC Adhesives
Many of our European and Australian buyers now request eco-friendly finishing options. Low-VOC or natural adhesives work well for sealing cut rattan edges. They bond effectively, dry clear, and align with sustainable crafting practices. If your end market values green credentials, this is a simple switch that adds value.
Should I soak my rattan webbing in water before I start cutting it for my project?
In our rattan processing facility in Indonesia, we handle raw material at every stage—from harvesting to weaving to finishing. We've tested dry cutting versus wet cutting thousands of times. The answer depends on your project, but soaking almost always helps.
Yes, soaking natural rattan cane webbing in warm water for 15–30 minutes before cutting is strongly recommended. Soaking softens the fibers, increases pliability, reduces the risk of cracking or splitting during cutting and manipulation, and makes the material easier to shape into curves or tuck into grooves during installation.

The Science Behind Soaking
Ротанг — это natural cellulose-based fiber 8. When dry, the cell walls are rigid. Water penetrates the fiber structure and acts as a plasticizer—it makes the cell walls slide past each other more easily. The result is a material that bends, flexes, and cuts without snapping. This is the same principle that makes wood easier to steam-bend.
How to Soak Properly
Fill a clean bathtub, trough, or large container with warm (not hot) water. Submerge the webbing completely. Let it soak for 15–30 minutes. For particularly stiff or thick webbing, some craftspeople add a small amount of glycerine to the water. Glycerine acts as a humectant—it helps the fibers retain moisture longer during the working process, giving you more time before the material stiffens again.
Dry Cutting: When Is It Acceptable?
There are situations where dry cutting works fine. If you're simply cutting a flat sheet to size for a panel insert—no bending, no tucking, no shaping—dry cutting with sharp scissors is quick and effective. The webbing stays flat and stable. Some of our wholesale clients who produce radiator covers or flat cabinet inserts prefer dry cutting for speed. The fibers don't need to be flexible because they won't be manipulated after cutting.
However, if your project involves any of the following, soaking first is essential:
- Pressing webbing into a spline channel
- Wrapping webbing around curves
- Tucking edges under a frame
- Weaving or hand caning a chair seat
Avoiding Over-Soaking
More is not always better. Soaking rattan for several hours—or overnight—can cause problems. Over-saturated fibers become too soft. They stretch unevenly. They take much longer to dry, which increases the risk of mold or mildew. Stick to the 15–30 minute range. Remove the webbing, pat off excess water, and begin working immediately.
Post-Soak Drying Precautions
After installation, rattan needs time to dry and contract. Clamp a flat piece of plywood over the installed webbing (if using spline) and leave it for two full days. This ensures even tension as the material dries. If you skip this step, the webbing may dry unevenly—some areas tight, others loose.
| Soaking Parameter | Recommendation | Почему это важно |
|---|---|---|
| Water temperature | Warm (not hot) | Hot water can damage the glossy outer skin of rattan fibers |
| Soak duration | 15–30 minutes | Sufficient to soften fibers without over-saturating |
| Additive (optional) | Small amount of glycerine | Extends working time by helping fibers retain moisture |
| Maximum soak time | 60 minutes | Beyond this, fibers become too soft and risk mold |
| Post-install drying | 24–48 hours, clamped flat | Ensures even contraction and tight final fit |
How do I accurately measure and cut rattan rolls to minimize waste in my furniture production?
Running three factories and coordinating with over 30 partner workshops has taught us one thing above all else: material waste 9 is the silent profit killer in rattan furniture production. Getting measurement and cutting right is not optional—it's essential for your bottom line.
To minimize waste, measure your frame or project area precisely, then add 2–4 inches of extra material on all sides as a working allowance. Mark cut lines on the webbing with a washable marker, align the weave direction consistently, use a straight edge for guiding cuts, and always test-cut on a scrap piece first before cutting your main roll.

Step 1: Measure the Frame, Not the Opening
A common beginner mistake is measuring only the visible opening—the area you want the webbing to cover. But you also need material to tuck into channels, wrap around edges, or staple to the underside. Always measure the full frame dimensions and then add your allowance.
For spline-channel installations, add at least 2 inches per side. For staple-and-trim installations, add 3–4 inches per side. This gives you enough material to grip, pull taut, and secure without running short.
Step 2: Pay Attention to Weave Direction
Rattan webbing has a repeating geometric pattern. If you're producing multiple identical pieces—say, a set of dining chair seats—the weave direction should be consistent across all pieces. Before cutting, unroll enough material to see the full pattern repeat. Mark your cut lines so that every piece has the same weave orientation. This small detail separates professional-looking furniture from amateur work.
Step 3: Nesting Cuts for Maximum Yield
On our production floor, we use a nesting approach 10 when cutting multiple pieces from a single roll. This means arranging the cut patterns as closely together as possible to minimize the gaps between them. Think of it like a puzzle. Plan all your cuts before making any of them. Sketch the layout on paper or use a washable marker directly on the webbing.
Step 4: Compensating for Pattern Irregularities
Natural rattan is a handwoven product. Sometimes the hole spacing isn't perfectly uniform—especially near the roll edges. When you encounter sections with uneven hole counts (for example, more holes on the front edge than the back edge of a chair seat), skip side holes to compensate. This keeps the visual pattern balanced without wasting an entire sheet.
Step 5: Cutting Technique for Clean Edges on Long Runs
For long straight cuts on production-scale rolls, lay the webbing flat on a large self-healing cutting mat. Place a metal ruler or T-square along your marked line. Run a sharp utility knife along the ruler in a single, firm stroke. Don't saw back and forth—that tears the fibers. One clean pass is always better than multiple hesitant ones.
Zero-Waste Mindset
Save your offcuts. Small scraps of rattan webbing have uses: test pieces for stain or finish samples, material for small decorative accents, or packing material for fragile items. Some of our clients who serve the DIY retail market bundle small offcuts into craft kits. Nothing has to go to waste.
Quick Reference: Measurement Allowances by Project Type
| Project Type | Visible Area Measurement | Extra Allowance Per Side | Total Material Needed |
|---|---|---|---|
| Chair seat (spline install) | Seat frame opening | +2 inches | Opening + 4 inches (width & length) |
| Cabinet door panel | Door frame rebate | +1.5 inches | Rebate + 3 inches (width & length) |
| Radiator cover (stapled) | Cover frame front | +3 inches | Front + 6 inches (width & length) |
| Room divider panel | Panel frame opening | +2.5 inches | Opening + 5 inches (width & length) |
| Headboard insert | Insert frame groove | +2 inches | Groove + 4 inches (width & length) |
Common Measurement Mistakes and Fixes
Here are pitfalls we've seen across hundreds of client projects:
- Measuring only once. Always measure twice. Natural wood frames can be slightly out of square.
- Ignoring roll width. Rattan rolls come in standard widths. If your project requires wider coverage than a single roll, plan your seam placement carefully.
- Forgetting shrinkage. Soaked rattan contracts as it dries. If you cut to exact size while the material is wet, it will end up slightly smaller than intended. Cut slightly oversized and trim after drying.
- Cutting on an uneven surface. An uneven table or floor causes the webbing to buckle, leading to crooked cuts. Always use a flat, stable surface.
Заключение
Cutting natural rattan cane webbing well comes down to sharp tools, proper soaking, accurate measurement, and smart edge finishing. Master these fundamentals and you'll save material, time, and money on every project.
Сноски
1. Provides general information about rattan cane webbing. ↩︎
2. Discusses environmentally friendly adhesive options. ↩︎
3. Explains the fundamental nature of rattan material. ↩︎
4. Provides information on a specific tool for cutting rattan. ↩︎
5. Explains the use of a specific cutting accessory. ↩︎
6. Explains the inherent behavior of woven materials. ↩︎
7. Describes a method for preventing fraying. ↩︎
8. Describes the chemical composition of rattan. ↩︎
9. Highlights the economic impact of inefficient material use. ↩︎
10. Explains a technique for optimizing material usage. ↩︎

