Every week at our Foshan warehouse, we see returned rattan webbing panels ruined by messy, frayed edges—damage that started with one bad cut.
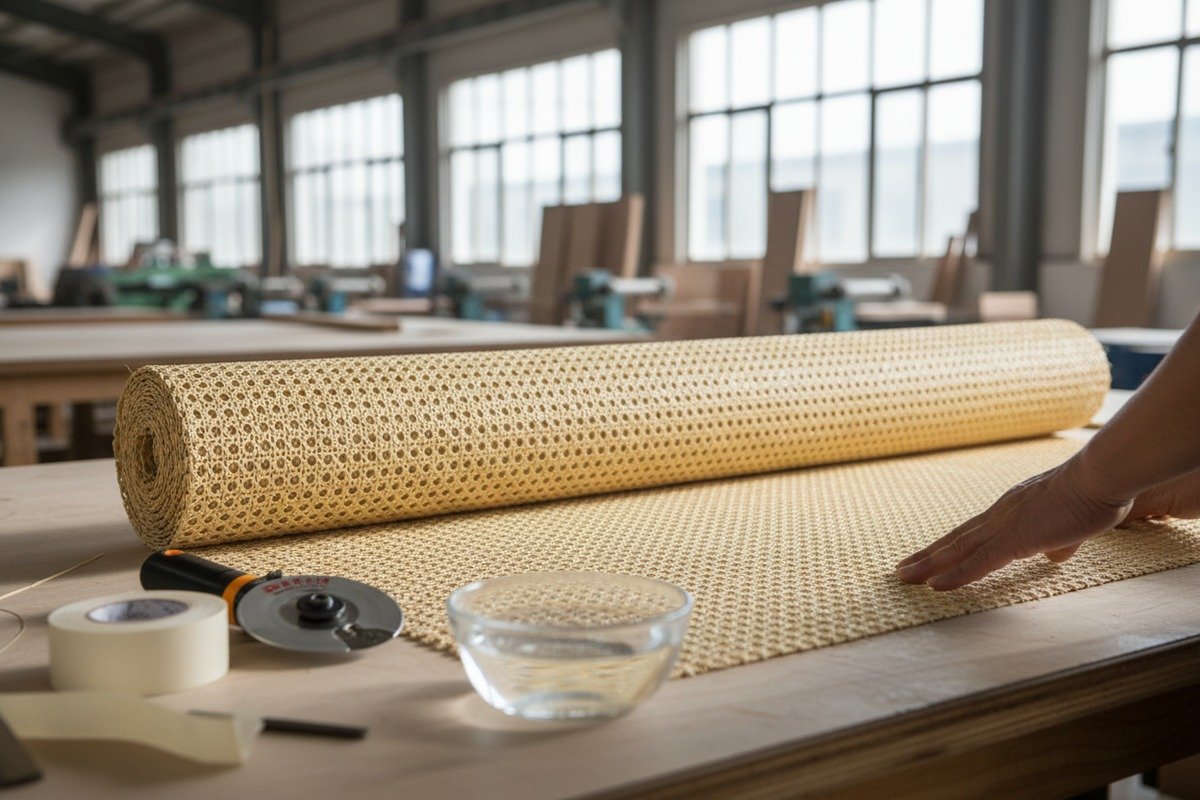
To properly cut rattan cane webbing without fraying, use extremely sharp tools like a rotary cutter or razor blade, soak natural cane in warm water for 30 minutes beforehand, apply masking tape along the cut line, cut in a single smooth motion, and immediately seal the edges with diluted wood glue or tuck them into a spline groove.
Below, we break down each step of this process. You will learn which tools give the cleanest edge, why soaking matters, how to seal and finish your cuts, and how to plan your layout to save material. Let’s get into it.
What tools should I use to get a clean edge on my rattan cane webbing?
A dull pair of household scissors is the number one reason we see customers end up with shredded rattan edges—our quality control team deals with this feedback regularly.
For the cleanest edge on rattan cane webbing, use a sharp rotary cutter with a self-healing mat for straight lines, a new single-edge razor blade for flush trimming, and sharp fabric shears for curved or freehand cuts. The key factor is blade sharpness, not the tool type itself.

Pourquoi la netteté est plus importante que le type d'outil
Rattan cane is made up of thin, interwoven fibres naturelles 1. When a blade is dull, it does not slice through these fibers. Instead, it crushes and tears them apart. This creates loose ends that immediately begin to unravel. A sharp blade, on the other hand, severs the fibers cleanly in one pass. The result is a tight, sealed edge with minimal loose strands.
We tested this in our own processing facility in Indonesia. Workers who used fresh razor blades 2 produced edges with almost zero visible fraying. Workers who reused old blades for more than a day saw fraying rates increase by roughly three times. The lesson is simple: replace your blade often.
Recommended Tools by Application
| Outil | Meilleur cas d'utilisation | Fraying Risk | Notes |
|---|---|---|---|
| Rotary cutter 3 | Long, straight cuts on flat sheets | Très faible | Use with a metal ruler and self-healing mat |
| Single-edge razor blade | Flush trimming inside grooves | Très faible | Angle the blade toward the outside of the groove |
| Sharp fabric shears | Curved cuts and freehand trimming | Faible | Must be genuinely sharp; test on scrap first |
| Utility knife (box cutter) | General-purpose cutting | Moyen | Snap off used segments to keep a fresh edge |
| Household scissors | Not recommended for final cuts | Élevé | Tends to crush fibers rather than slice them |
| Small saw | Thick or layered rattan panels | Moyen-élevé | Use only for non-woven rattan board, not Sangle en rotin 4 |
The Rotary Cutter Advantage
For anyone cutting full sheets of cane webbing—especially the tissage radio 5 or square basketweave patterns we supply—a rotary cutter is the best option. It rolls through the material in one continuous motion. There is no back-and-forth sawing. This single-pass approach is critical because every repeated stroke over the same line loosens more fibers.
Pair the rotary cutter with a clear acrylic ruler 6. Press the ruler firmly on the webbing to hold it flat and guide your cut. The pressure from the ruler also compresses the fibers right along the cut line, which further reduces fraying.
Angle Your Blade Correctly
When you trim rattan webbing that is already seated in a furniture groove, tilt the razor blade outward, away from the groove channel. This ensures you cut the cane right at the lip of the groove without accidentally shortening it below the surface. A perpendicular cut in this situation tends to pull fibers upward and out of the groove, creating visible fray.
Maintaining Your Tools
Keep a small sharpening stone 7 nearby if you use shears. For rotary cutters, buy replacement blades in bulk. In our production line, we replace rotary blades after every 20 linear meters of cane webbing. For home projects, replace the blade after every project or whenever you notice resistance during the cut.
Should I soak my rattan webbing before I begin the cutting process?
When we first started exporting natural rattan webbing to European furniture makers, several clients told us their cane cracked and split when they tried to cut it dry—this is a very common mistake.
Yes, you should soak natural rattan cane webbing in warm water for 15 to 60 minutes before cutting. Soaking softens the fibers and makes them pliable, which prevents the brittle snapping and splitting that causes fraying. However, synthetic rattan webbing does not need soaking and can be cut dry.

How Soaking Prevents Fraying
Dry rattan is rigid. When you press a blade through dry cane, the fibers resist bending. Instead of separating neatly, they snap. Each snapped fiber becomes a loose end that sticks out from the cut edge. Over time, these loose ends catch on things and pull even more fibers free.
Soaking changes the fiber behavior. Water enters the cell walls of the rattan and makes them flexible. When you cut wet cane, the fibers bend slightly before the blade passes through. This bending allows for a cleaner separation with fewer broken strands.
Soaking Guidelines by Material Type
| Type de matériau | Trempage requis ? | Durée de trempage recommandée | Température de l'eau | Notes |
|---|---|---|---|---|
| Tissage de rotin naturel | Oui | 30–60 minutes | Tiède (pas chaude) | Longer for thicker weaves |
| Tissage de rotin blanchi | Oui | 15–30 minutes | Tiède (pas chaude) | Bleaching makes fibers more delicate; do not over-soak |
| Rotin synthétique 8 sangles | Non | N/A | N/A | Can be heat-sealed instead |
| Natural rattan peel or bark | Oui | 20–40 minutes | Warm | Thinner material soaks faster |
The Right Way to Soak
Fill a clean tub or bathtub with warm water. The water should be comfortable to touch—around 30 to 40 degrees Celsius. Do not use hot water. Hot water can discolor natural rattan and weaken the fibers.
Submerge the webbing completely. If you are cutting a large sheet, roll it loosely and place it in the tub. Make sure water reaches all parts of the roll. After soaking, lift the webbing out and lay it flat on a clean, dry towel. Blot away excess water. You want the cane damp and pliable, not dripping wet. Excess water can cause the fibers to swell too much, which makes precise cutting harder.
When to Skip Soaking
If you are working with synthetic rattan—like the chevron-patterned plastic matting we produce for outdoor furniture—skip soaking entirely. Synthetic rattan is made from plastic polymers 9 that do not absorb water. Instead, you can use a heat gun on a low setting to lightly seal the cut edges of synthetic webbing. The heat melts the plastic fibers together, creating a clean, fray-proof edge.
A Common Mistake: Over-Soaking
Some people leave cane in water overnight, thinking longer is better. This is wrong. Over-soaked rattan becomes mushy. The weave loosens. When you cut mushy cane, the blade pushes fibers aside instead of cutting them. The result is a sloppy, uneven edge that frays badly once the material dries and contracts. Stick to the recommended soak times listed above.
After cutting, allow your rattan piece to dry completely before final installation. Drying usually takes one to two days. Some professionals clamp the webbing between flat plywood boards during drying to keep it flat and taut as it shrinks back.
How can I seal the edges of my cut rattan to ensure it stays intact during assembly?
One thing we learned early in our production process is that cutting is only half the battle—what you do in the 30 seconds right after the cut determines whether that edge holds or falls apart.
To seal cut rattan edges, apply a thin line of diluted wood glue or clear fabric stiffener along the cut edge and let it dry before handling. Alternatively, press painter's tape along both sides of the cut line before cutting, or tuck the raw edge into a spline groove and secure it with a bead of glue.

Pre-Cut Sealing: The Tape and Glue Method
This is the technique our factory workers use for precision cuts on high-end cane webbing orders. Before you even pick up the blade, apply a strip of painter's tape or masking tape firmly along both sides of your intended cut line. Press it down well so it grips the fibers. The tape holds the woven strands in place during the cut. After cutting, peel the tape off gently.
For even more protection, brush a thin coat of diluted wood glue along the cut line on the back (dull) side of the webbing before taping. Use a 50/50 mix of white wood glue and water. Let it dry until tacky—about 10 to 15 minutes. Then tape, then cut. This two-step approach locks fibers in place before the blade touches them.
Post-Cut Sealing Options
| Sealing Method | Application | Temps de séchage | Visibility on Finished Piece | Idéal pour |
|---|---|---|---|---|
| Diluted wood glue (50/50 with water) | Brush along cut edge on back side | 15–30 minutes | Presque invisible | All natural rattan types |
| Clear fabric stiffener | Brush or spray along cut edge | 20–40 minutes | Invisible une fois sec | Delicate or open-weave patterns |
| Painter's tape (pre-cut) | Press along both sides of cut line | Immédiat | Removed after cutting | Any webbing type |
| Spline and groove tuck | Wedge raw edge into furniture groove | N/A (mechanical hold) | Complètement caché | Assises de chaise, panneaux de meuble |
| Decorative trim or molding | Glue or nail trim over raw edge | Varie | Recouvert par moulure | Visible panel edges, doors |
| Heat sealing | Low heat gun on cut edge | Seconds | Slight sheen | Synthetic rattan only |
The Spline and Groove Method
For furniture applications like chair seats and cabinet door panels, the most effective way to deal with a cut edge is to hide it entirely. The spline and groove system does exactly this. spline joint 10 You press the raw edge of the webbing down into a routed groove in the wood frame, then push a flexible spline (a thin reed or rubber cord) on top of it. The spline locks the cane in place.
Before pressing the spline in, run a thin bead of wood glue along the inside of the groove. This glue bonds the cane fibers to the groove wall and prevents any future loosening. When the spline is fully seated, the raw edge is buried and invisible.
Dealing with Edges That Will Stay Exposed
Not every edge can be hidden. If you are wrapping rattan around a table leg or attaching it to a flat surface, the cut edge may remain visible. In these cases, your best options are:
- Apply diluted wood glue to the edge and let it dry completely before assembly.
- Cover the edge with a thin strip of rattan binding or decorative trim, secured with small nails or adhesive.
- Fold the edge under itself by about 5 millimeters and glue it down, creating a hemmed edge.
The folded-hem approach works especially well with thinner, more pliable weaves like our open hexagonal radio weave. Thicker basketweave patterns are harder to fold neatly.
A Note on Clear Sealants
Some DIY guides suggest using polyurethane or lacquer spray on cut edges. While these products do seal fibers, they can darken natural rattan and create a shiny, plastic-looking finish that looks out of place on a rustic material. If you want a clear sealant, stick with matte-finish fabric stiffener or diluted PVA glue. These dry clear and do not alter the natural look of the cane.
What are the best practices for measuring and cutting my rattan to minimize material waste?
Our three factories ship rattan webbing by the roll, and one question we hear from furniture makers every single week is: "How do I plan my cuts so I don't waste half the roll?"
To minimize rattan webbing waste, measure your project dimensions carefully and add a 2- to 4-inch allowance on all sides for trimming and securing. Plan your cut layout on the full sheet before making any cuts, orient cuts parallel to the longer weave strands, and use templates for repeated shapes.

Why Allowance Matters
Rattan webbing is not like plywood. You cannot cut it to the exact finished size and expect it to fit perfectly. The material stretches slightly when wet and contracts when dry. If you cut it flush to your frame dimensions, it may shrink 2 to 3 millimeters on each side during drying. That small gap becomes visible and weakens the hold.
Always add at least 2 inches of extra material beyond each edge of your frame or groove. For larger pieces—such as a full chair seat—go with 3 to 4 inches. This extra material gets tucked into grooves, folded under edges, or trimmed away after installation.
Planning Your Cut Layout
Before you touch the webbing with a blade, lay it out flat on a large, clean surface. Place your frame, template, or pattern pieces on top. Move them around to find the arrangement that uses the least material. Mark your cut lines lightly with a pencil or chalk on the back (dull) side of the cane.
Here is a general rule: orient your longest cut so it runs parallel to the longer, more continuous strands of the weave. This means you are cutting across fewer cross-fibers. Fewer severed cross-fibers means less fraying and a more stable edge.
Cut Planning Checklist
| Étape | Action | Objectif |
|---|---|---|
| 1 | Measure frame or panel opening | Determine base dimensions |
| 2 | Add 2–4 inches on each side | Allow for shrinkage and securing |
| 3 | Lay webbing flat, shiny side down | Work on the back for marking |
| 4 | Place all pattern pieces before cutting | Optimize layout to reduce waste |
| 5 | Orient cuts parallel to long strands | Minimize severed cross-fibers |
| 6 | Mark lines with pencil or chalk | Ensure accuracy before cutting |
| 7 | Apply tape along cut lines | Hold fibers in place |
| 8 | Cut with sharp tool in one motion | Achieve clean, fray-free edges |
Batch Cutting for Production Efficiency
If you are a furniture factory cutting dozens of identical panels—like many of our wholesale clients do—create a rigid template from plywood or MDF. Clamp the template on top of the webbing and cut around it with a rotary cutter. This guarantees identical pieces every time and eliminates the measuring step after the first cut.
For oddly shaped panels, like the arched cabinet doors popular in European design right now, make a cardboard template first. Test the fit on your frame. Adjust if needed. Only then transfer the shape to your rattan webbing.
Nesting Odd Shapes
When cutting multiple non-rectangular pieces from a single sheet, nest the shapes together like puzzle pieces. Rotate alternating pieces by 180 degrees to see if they interlock more tightly. Even small adjustments can save 5 to 10 percent of your material. On a bulk order of several hundred square meters—common among our building material wholesaler clients—that saving adds up fast.
Handling Offcuts
Do not throw away your scraps. Small pieces of rattan cane webbing are useful for testing stain colors, practicing cuts, making coasters, or creating small decorative accents. Many of our clients in the Netherlands and Australia repurpose offcuts into lamp shades and photo frame inserts. A piece as small as 15 by 15 centimeters has creative potential.
Avoid the Sawing Motion
This bears repeating because it directly affects both fraying and waste. Never saw back and forth through rattan webbing. Each back-and-forth stroke widens the cut line and destroys fibers on both sides. Use a single, firm, continuous stroke. If the blade does not go all the way through, reposition and cut again in the same direction—do not reverse. A sawing motion can widen a cut by 2 to 3 millimeters, which over multiple cuts across a sheet adds up to significant wasted material.
Conclusion
Proper rattan cutting comes down to sharp tools, correct preparation, immediate edge sealing, and smart layout planning—master these four steps and fraying becomes a problem of the past.
Notes de bas de page
1. Defines what natural fibers are, relevant to rattan composition. ↩︎
2. Provides information on various types and uses of razor blades. ↩︎
3. Direct replacement for the broken Wikipedia link, authoritative source. ↩︎
4. Explains what cane webbing is and its traditional uses. ↩︎
5. Illustrates different cane webbing patterns, including radio weave. ↩︎
6. Reputable retailer with product description, relevant to the context. ↩︎
7. Explains how to use and choose sharpening stones for tools. ↩︎
8. Discusses synthetic rattan as a durable material for outdoor furniture. ↩︎
9. Provides a scientific explanation of what plastic polymers are. ↩︎
10. Authoritative Wikipedia article explaining spline joints, which are a type of spline and groove system. ↩︎

