Meta-Beschreibung:
Verwandeln Sie Ihren einfachen IKEA IVAR Schrank in ein High-End-Boho-Meisterwerk. Folgen Sie unserer Schritt-für-Schritt-Anleitung zur Installation von Rattan-Rohrgeflecht für ein atemberaubendes DIY-Möbel-Makeover. Kaufen Sie Premium-Materialien bei Rattan Wholesaler.
Schlüsselwörter:
IKEA IVAR Hack, Rattan Schrank DIY, Rohrgeflecht für Möbel, IKEA Möbel Makeover, Boho Chic Deko, Rattan Geflecht kaufen, Rattan Wholesaler.
Einleitung: Die Magie des IKEA IVAR Hacks
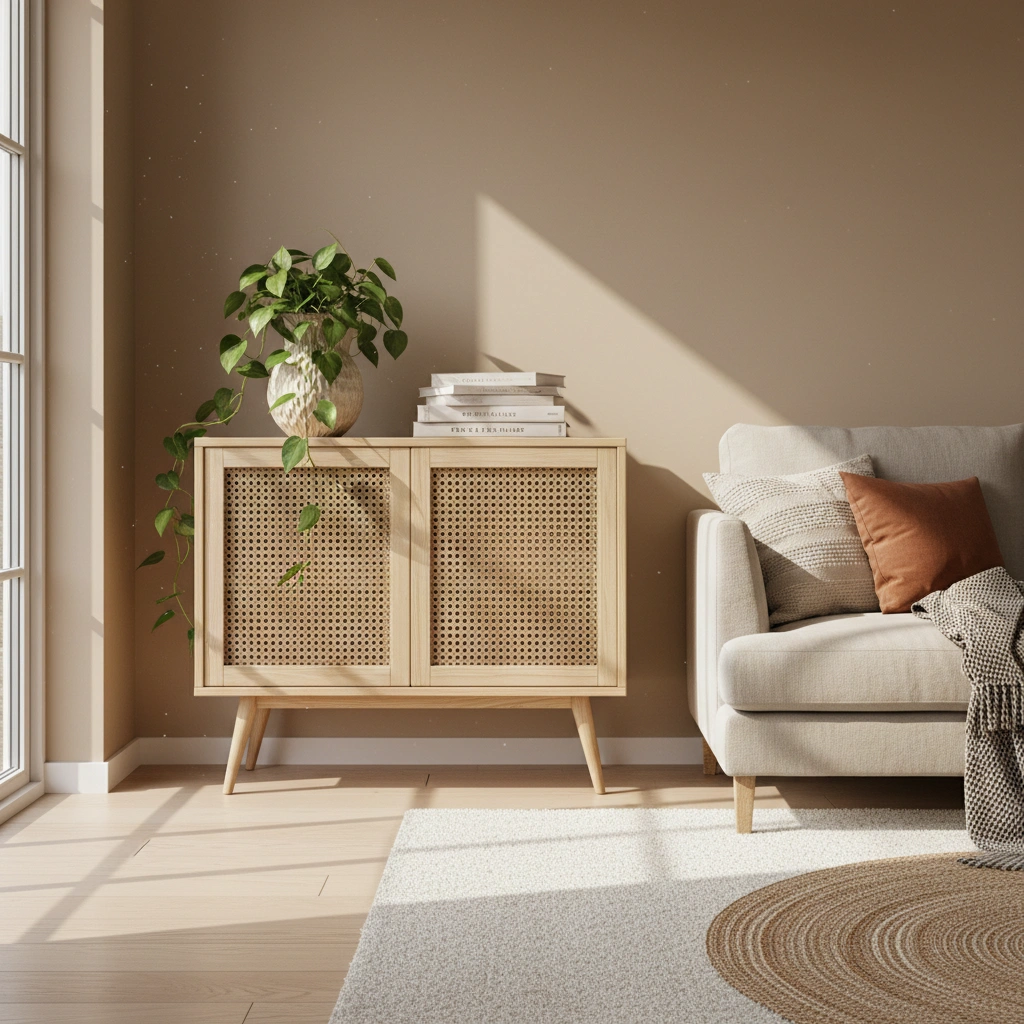
Wenn Sie in letzter Zeit Zeit auf Pinterest oder Instagram verbracht haben, wissen Sie, dass der "IKEA Hack" mehr als nur ein Trend ist – er ist eine Designbewegung. Eines der vielseitigsten Stücke zum Hacken ist der IKEA IVAR Schrank. Mit seinem einfachen, unbehandelten Kiefernholzrahmen dient er als perfekte leere Leinwand für kreative Hausbesitzer.
Aber wie verwandelt man eine einfache Holzkiste in ein Sideboard in Designerqualität? Die Antwort ist Rattan-Rohrgeflecht.
Das Hinzufügen von Rattan-Textur zu den Türen wertet das Stück sofort auf und verleiht ihm einen warmen, organischen und trendigen Boho-Skandi-Look. Als professioneller Rattan Wholesaler, wissen wir, dass das Geheimnis eines erfolgreichen DIY nicht nur Können ist – es ist die Qualität des Materials, das Sie verwenden.
In dieser Anleitung führen wir Sie durch das ultimative IVAR-Makeover, damit Ihr fertiges Stück professionell aussieht und nicht nur "hausgemacht"."
—
Warum Rattan-Rohrgeflecht wählen?
Rattan ist ein zeitloses Material, das in der Innenarchitektur ein riesiges Comeback erlebt hat. Hier ist, warum es perfekt für Ihren IKEA-Hack ist:
- Ästhetischer Reiz: Das natürliche sechseckige Geflecht (oft "Radio-Geflecht" genannt) verleiht neutralen Räumen sofort Textur und Wärme.
- Vielseitigkeit: Egal, ob Ihr Zuhause modern, maritim, böhmisch oder Mid-Century ist, Rattan passt perfekt dazu.
- Atmungsaktivität: Wenn Sie Ihr IVAR zur Aufbewahrung von Bettwäsche, Elektronik oder Medienkonsolen verwenden, sorgt das offene Geflecht für Luftzirkulation und verhindert Muffigkeit und Überhitzung.
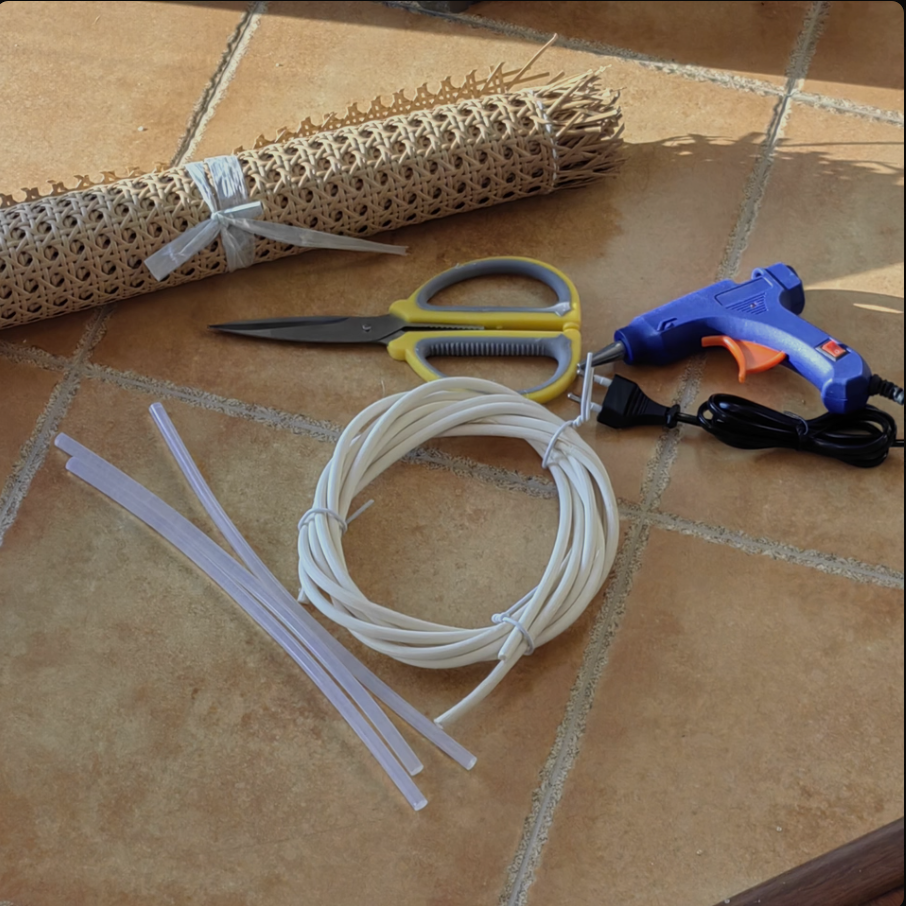
Was Sie brauchen werden
Bevor Sie beginnen, sammeln Sie Ihre Werkzeuge. Die Verwendung von hochwertigem Rohrstuhlgeflecht ist entscheidend für ein straffes, haltbares Finish, das mit der Zeit nicht durchhängt.
Materialien:
- IKEA IVAR Schrank (Rahmen und Türen).
- Hochwertiges Rattan-Rohrstuhlgeflecht: Die hochwertigste, strapazierfähigste Bespannung finden Sie genau hier bei www.rattanwholesaler.com.
- Holzleim.
- Holzspachtel.
- Farbe oder Beize (optional, für den Holzrahmen).
Werkzeuge:
- Stichsäge: Zum Ausschneiden der Türpaneele.
- Bohrer: Zum Erstellen von Startlöchern für die Säge.
- Tacker: Mit robusten Klammern (6 mm oder 8 mm).
- Schleifpapier: 120er und 240er Körnung.
- Schere: Robust, zum Trimmen des Rattans.
- Eimer oder Wanne: Zum Einweichen des Rattans.
Schritt für Schritt: Der Makeover-Prozess
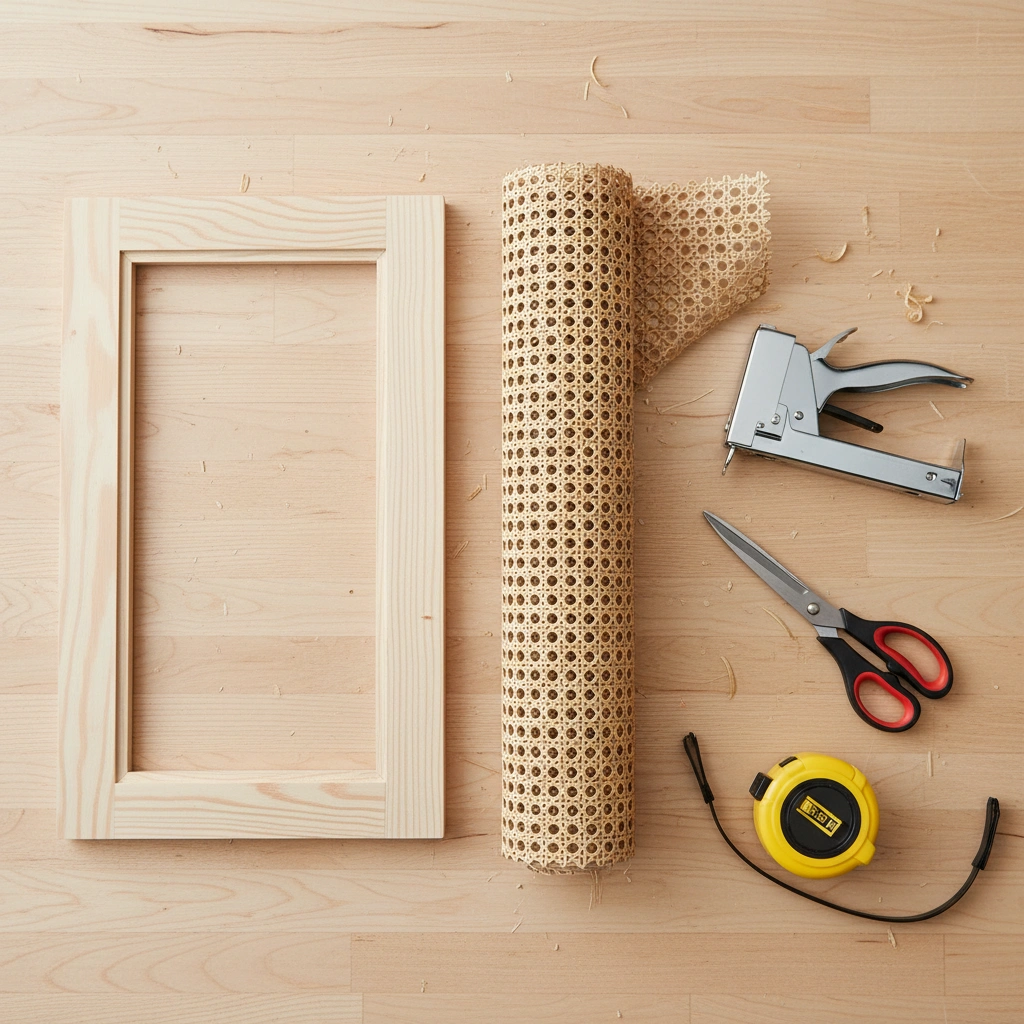
Schritt 1: Türen vorbereiten
Die Standard-IVAR-Türen sind aus Massivholz. Um Rattan hinzuzufügen, müssen Sie ein Fenster erstellen.
- Messen Sie einen Rand von 5-6 cm (ca. 2 Zoll) um die Kante der Tür.
- Bohren Sie in jede der vier Ecken Ihres markierten Quadrats ein Loch.
- Führen Sie Ihre Stichsägeblatt in das Bohloch ein und schneiden Sie vorsichtig entlang Ihrer Linien, um die Mittelplatte zu entfernen.
- Schleifen Sie die Schnittkanten, bis sie glatt sind.
Schritt 2: Der geheime Schritt – Das Einweichen des Rattans
Überspringen Sie diesen Schritt nicht! Rattan ist eine Naturfaser, die sich bei Nässe ausdehnt und bei Trockenheit schrumpft.
- Schneiden Sie Ihr Rattangeflecht auf Größe zu und lassen Sie an allen Seiten etwa 2 Zoll Überstand.
- Weichen Sie die Bahnen in warmem Wasser für 30 Minuten.
- Dies macht das Rattan flexibel und leichter zu verarbeiten. Wichtiger ist, dass es beim Trocknen auf dem Rahmen schrumpft und eine professionelle, trommelstraffe Oberfläche ergibt.
Schritt 3: Anbringen des Geflechts
- Legen Sie Ihre feuchte Rattanschiene über die Rückseite des Türrahmens.
- Richten Sie das Webmuster so aus, dass es von vorne gerade aussieht.
- Heften Sie zuerst die Mitte der oberen Kante fest. Ziehen Sie dann das Rattan straff und heften Sie die Mitte der unteren Kante fest.
- Wiederholen Sie dies für die Seiten und ziehen Sie dabei sanft.
- Heften Sie weiter am Umfang entlang und setzen Sie alle 1-2 Zoll eine Klammer.
Schritt 4: Zuschneiden und Fertigstellen
Sobald das Rattan befestigt ist, schneiden Sie mit Ihrer scharfen Schere oder einem Cuttermesser das überstehende Geflecht bündig mit den Klammern ab.
- Profi-Tipp: Für ein saubereres Aussehen auf der Innenseite der Tür können Sie dünne Holzleisten (Gitterleisten) über die geklammerten Kanten kleben, um diese zu verdecken.
Schritt 5: Montage und Styling
Lassen Sie die Türen vollständig trocknen (vorzugsweise über Nacht), bevor Sie sie am Schrank befestigen. Wenn Sie den Kiefernholzrahmen streichen oder beizen möchten, tun Sie dies, bevor Sie das Rattan anbringen, um Tropfen auf dem natürlichen Geflecht zu vermeiden.
Fügen Sie einige elegante goldene oder mattschwarze Griffbeschläge hinzu, um den hochwertigen Look zu vervollständigen.
Den Look für weniger bekommen
Sie müssen keine Tausende für Designermöbel ausgeben. Mit ein wenig Mühe und den richtigen Materialien können Sie ein individuelles Stück kreieren, das Ihren persönlichen Stil widerspiegelt.
Bereit, Ihr Projekt zu starten? Gehen Sie keine Kompromisse bei der Qualität ein. Stöbern Sie in unserer Auswahl an Hochwertige Rattan-Bespannung bei www.rattanwholesaler.com und erhalten Sie die besten Preise für Ihre DIY-Projekte.
Viel Spaß beim Heimwerken!
Was können wir für Sie tun?
Wir können alle Geflechte und Werkzeuge für Ihren Markt anbieten.
Mindestbestellmenge: 10 Stück.
Kontaktieren Sie uns jetzt: WhatsApp: +86 13927710930