Nach jahrelangem Versand Rattan-Rohrgeflecht 1 von Rollen an Möbelhersteller in ganz Europa, Amerika und dem Nahen Osten haben wir unzählige schöne Projekte beobachtet, die im letzten Schritt – den Kanten – scheiterten. Ausgefranste Stränge, sichtbare Klammern und rissige Ränder können ein ansonsten atemberaubendes Stück ruinieren. Dies ist ein Problem, von dem wir wöchentlich von unseren Großhandelskunden hören. Und es ist vollständig vermeidbar.
Das professionelle Veredeln von Rattan-Rohrgeflechtkanten erfordert das Einweichen des Materials zur Flexibilität, das Sichern mit Bindrohr oder Spline, das Trimmen von Überschüssen mit scharfen Werkzeugen und das Versiegeln mit verdünntem Polyurethan oder Schellack. Richtiges Feuchtigkeitsmanagement und Verbergungstechniken schaffen saubere, langlebige, galerie-taugliche Ränder.
In diesem Leitfaden erläutern wir die genauen Methoden, die unsere Möbelwerkstattkunden anwenden, um makellose Rattan-Kanten zu erzielen. Egal, ob Sie Einkaufsmanager sind, der Materialien beschafft, oder ein Werkstattteam, das die Installation von Hand vornimmt, jede der folgenden Techniken ist erprobt und bewährt. Gehen wir Schritt für Schritt vor.
Wie kann ich die rohen Kanten meines Rattan-Rohrgeflechts verstecken, um ein sauberes Aussehen zu erzielen?
Als wir anfingen, vorgefertigte Rohrstuhlgeflechtbahnen an Möbelfabriken in den Niederlanden und Spanien zu liefern, war die häufigste Beschwerde nicht die Webqualität – es waren hässliche, roh geschnittene Kanten, die am fertigen Produkt sichtbar waren. Käufer riefen frustriert an und fragten sich, wie sie die Ränder verschwinden lassen könnten.
Um rohe Kanten zu verbergen, bringen Sie dekorative Holzleisten, Peddigrohr-Spline oder Rundrohr über die freiliegenden Schnitte an. Befestigen Sie diese Abdeckmaterialien mit kleinen Nägeln, Holzleim oder indem Sie den Spline mit einer Spline-Rolle in eine gefräste Nut drücken. Dies verbirgt Befestigungselemente und schafft einen polierten, nahtlosen Rand.

Ihre Verdeckungsoptionen verstehen
Es gibt mehrere bewährte Methoden, um rohe Kanten zu verbergen. Ihre Wahl hängt vom Möbelstil, dem Rahmendesign und dem gewünschten Aussehen ab. Hier ist eine Aufschlüsselung der gängigsten Ansätze.
| Methode | Am besten geeignet für | Benötigte Werkzeuge | Schwierigkeit |
|---|---|---|---|
| Rattan-Spline 2 in gefräster Nut | Eingesetzte Paneele (Stuhlsitze, Schranktüren) | Spline-Rolle, Meißel, Kleber | Mittel |
| Dekorative Holzleiste | Flachpaneelanwendungen, Kopfteile | Kleine Nägel, Hammer, Holzleim 3 | Einfach |
| Rundrohr-Overlay | Traditionelle Rohrstuhl-Stühle | Ahle, Dübel, Kleber | Mittel |
| Bindrohr 4 wickeln | Hand-geflochtene Rahmen mit Löchern | Ahle, Dübel, 4mm Flechtband | Fortgeschritten |
| Metall- oder Lederkante | Moderne/industrielle Designs | Klebstoff, kleine Schrauben | Einfach |
Die Spline-Methode
Für Möbel mit gefrästen Nuten um die Plattenöffnung ist Flechtband der Goldstandard. Sie drücken das Gewebe in die Nut und schieben dann mit einer Spline-Rolle das Spline darüber. Dies verriegelt das Gewebe und verbirgt jede rohe Strähne. Tragen Sie eine dünne Linie Holzleim in die Nut auf, bevor Sie das Spline für einen dauerhaften Halt einsetzen. Das Ergebnis ist eine saubere, ebene Oberfläche ohne sichtbare Beschläge.
Die Zierleisten-Überlappungsmethode
Bei flachen Oberflächen – wie der Rückseite eines Kopfteils oder einer Schranktür – ist eine dekorative Holzleiste die einfachste Lösung. Heften Sie das Gewebe zuerst auf die Rückseite des Rahmens. Nageln oder kleben Sie dann eine dünne Holzleiste über die geheftete Kante. Dies deckt alles ab. Viele unserer Kunden in Australien und den USA bevorzugen diesen Ansatz wegen seiner Einfachheit und der gestalterischen Flexibilität, die er bietet. Sie können die Leiste passend zum Rattan lackieren oder beizen oder einen Kontrast schaffen.
Rückseitige Fase für ebene Platten
Ein professioneller Trick, den wir mit unseren Fabrikpartnern teilen, ist die Rückseitenfase. Schneiden Sie vor der Installation eine dezente Vertiefung entlang der Innenkante des Rahmens. Dadurch kann das Gewebe etwas unter der Oberfläche liegen. Wenn Sie dann eine Leiste oder ein Spline darüber anbringen, liegt alles bündig. Es gibt keine Kante, keine Wölbung und keinen sichtbaren Übergang zwischen Rattan und Holz. Es sieht aus, als wäre das Gewebe dort natürlich gewachsen.
Flechtband für traditionelle Rahmen
Für Stühle mit gebohrten Löchern um die Sitzöffnung – der klassische Thonet-Stil – verwenden Sie 4 mm schmales Flechtband. Fädeln Sie es durch die Löcher über die gewebten Stränge. Halten Sie die glänzende Seite nach außen. Verwenden Sie eine Ahle 5 um lose Enden anzuheben und darunter zu stecken. Diese Methode wird seit über einem Jahrhundert angewendet und liefert immer noch das sauberste traditionelle Finish.
Welche Oberflächenmaterialien sollte ich verwenden, um meine Rattankanten dauerhaft zu befestigen?
Durch jahrelange Tests in unseren drei Fabriken – einschließlich unserer eigenen Rattanverarbeitungsanlage in Indonesien – haben wir jedes Oberflächenmaterial unter realen Bedingungen getestet. Einige halten sich schön. Andere reißen, vergilben oder blättern innerhalb weniger Monate ab. Der Unterschied liegt in der Wahl des richtigen Produkts und dessen korrekter Anwendung.
Verwenden Sie verdünntes Polyurethan, Schellack oder Klarlack, um Rattankanten dauerhaft zu versiegeln. Tragen Sie es in leichten, gleichmäßigen Schichten auf, um Rissbildung zu vermeiden. Für Farbindividualisierung eignen sich Anilinfarbstoffe gut für natürliche Rohre. Holzleim oder klarer Bastelkleber sichert strukturelle Verbindungen, während Bienenwachs eine natürliche Alternative mit geringem Glanz bietet.

Dichtstoffe und Schutzlacke
Die Debatte zwischen der unbehandelten und der versiegelten Behandlung von Rattan ist real. Traditionalisten argumentieren, dass unbehandeltes Rohr besser atmet. Es nimmt Feuchtigkeit auf und gibt sie ab, wodurch die Fasern über Jahrzehnte flexibel bleiben. Modernisten kontern, dass ein verdünnter Dichtstoff vor UV-Schäden, Flecken und vorzeitigem Verschleiß schützt – insbesondere bei Möbeln für den gewerblichen Bereich, die stark beansprucht werden.
Unsere Empfehlung an Großhandelskunden liegt dazwischen. Für Wohnmöbel im Innenbereich, eine leichte Schicht verdünnte Schellack 6 bewahrt die natürliche Farbe und bietet minimalen Oberflächenschutz. Für gewerbliche oder an Außenbereiche angrenzende Stücke, verdünntes Polyurethan 7 bietet bessere Haltbarkeit. Das Schlüsselwort ist "verdünnt". Dicke Schichten reißen, wenn das Rattan mit Feuchtigkeitsänderungen expandiert und kontrahiert.
Materialvergleich
| Material | Schutzniveau | Aussehen | Trocknungszeit | Bester Anwendungsfall |
|---|---|---|---|---|
| Verdünntes Polyurethan | Hoch | Leichter Glanz, warmer Ton | 4-6 Stunden pro Schicht | Möbel für den gewerblichen Bereich, stark beanspruchte Stücke |
| Schellack | Mittel | Natürliches warmes Bernstein | 1-2 Stunden pro Schicht | Innenbereich Wohnen, Restaurierung von Vintage-Möbeln |
| Klarer Lack | Hoch | Variable Glanzoptionen | 6-8 Stunden pro Schicht | Möbel im Außenbereich |
| Bienenwachs | Niedrig | Matt, natürlich | Sofort | Handwerkliche, umweltbewusste Projekte |
| Anilinfarbe + Versiegelung | Hoch | Individuelle Farbe | Variiert | Designermöbel, Markenprodukte |
Klebstoffe zur strukturellen Befestigung
Über Oberflächenbehandlungen hinaus benötigen Sie Klebstoffe, um Kanten dauerhaft zu fixieren. Standard-Holzleim (auf PVA-Basis) eignet sich gut zum Einpressen von Spänen in Nuten und zum Anbringen von Verzierungen. Für die Kanten der Bespannung selbst verhindert eine dünne Linie klaren Bastelklebers, der auf rohe Schnittkanten aufgetragen wird, vor der Installation, dass sich die Fasern mit der Zeit trennen. Einige unserer Fabrikpartner in der Türkei und Griechenland verwenden eine Kombination – Bastelkleber auf rohen Kanten während der Installation, gefolgt von einer Polyurethanversiegelung, sobald alles getrocknet ist.
Der Färbetrend
Im Jahr 2025 erfreut sich individuell gefärbtes Rattan wachsender Beliebtheit. Wir versenden mehr gebleichte und vorgärbte Bänder als je zuvor. Viele Möbelhersteller ziehen es jedoch vor, die Bänder nach der Installation zu beizen, um eine exakte Farbabstimmung zu erzielen. Anilinfarben 8 dringen gleichmäßig in Naturfasern ein, ohne die gewebte Textur zu verdecken. Tragen Sie die Farbe zuerst auf, lassen Sie sie vollständig trocknen und versiegeln Sie sie dann mit einer verdünnten Deckschicht. Dieser schichtweise Ansatz bietet die größte Kontrolle über das Endergebnis.
Anwendungstipps
Testen Sie Ihre Oberflächenbehandlung immer an einem Reststück derselben Bandcharge. Rattan nimmt Oberflächenbehandlungen unterschiedlich auf, abhängig von Art, Alter und Webdichte. Verwenden Sie eine weiche Bürste oder ein fusselfreies Tuch. Tragen Sie die Farbe in Richtung des Gewebes auf, nicht dagegen. Zwei dünne Schichten sind immer besser als eine dicke Schicht. Lassen Sie die Schichten vollständig trocknen – das überstürzte Ausführen dieses Schritts ist die häufigste Ursache für Oberflächenfehler, die wir bei Kunden sehen.
Wie kann ich verhindern, dass sich meine Rohrspannung während des Installationsprozesses ausfranst?
Einer unserer erfahrensten Produktionsleiter in Foshan sagte mir einmal etwas, das mir im Gedächtnis geblieben ist: "Ausfransen geschieht nicht wegen schlechten Rattans. Es geschieht wegen schlechter Vorbereitung." Nachdem wir Tausende von Bahnen in unseren Partnerfabriken geschnitten und installiert haben, können wir bestätigen, dass fast jedes Ausfransenproblem auf einen übersprungenen oder überstürzten Vorbereitungsschritt zurückzuführen ist.
Verhindern Sie Ausfransen, indem Sie Rattan-Geflecht vor dem Schneiden 30-60 Minuten in warmem Wasser einweichen, nur scharfe Scheren oder Cuttermesser verwenden und die Schnittkanten sofort mit einer dünnen Linie klarem Bastelkleber oder Stoffversiegelung versehen. Halten Sie das Material während der Installation feucht und arbeiten Sie in kleinen Abschnitten.

Der Einweichschritt, den Sie nicht überspringen können
Trockenes Rattan ist sprödes Rattan. Wenn Sie trockenen Rohrstock schneiden, spalten und trennen sich die Fasern. Wenn Sie ihn biegen, bricht er. Das Einweichen in warmem Wasser für 30 Minuten macht die Naturfasern weich und geschmeidig. Das Rohr wird nachgiebig. Es biegt sich, ohne zu brechen, und lässt sich sauber schneiden, ohne auszufasern.
Einige Fachleute fügen eine kleine Menge Glycerin 9 zum Einweichwasser hinzu. Dies ist eine Nischentechnik, aber sie verbessert die Geschmeidigkeit weiter. Das Glycerin wirkt als Feuchthaltemittel und hilft den Fasern, während des Installationsprozesses länger Feuchtigkeit zu speichern. Wir haben dies in unserer indonesischen Verarbeitungsanlage getestet, und der Unterschied ist spürbar – besonders bei dickeren Geweben.
Scharfe Werkzeuge sind nicht verhandelbar
Stumpfe Klingen reißen Fasern, anstatt sie zu schneiden. Dieser einzelne Faktor verursacht mehr Ausfransen als jeder andere. Verwenden Sie eine scharfe Schere, eine frische Cuttermesser 10 Klinge oder eine Bastelschere. Ersetzen Sie die Klingen bei großen Projekten häufig. Ein sauberer, entscheidender Schnitt versiegelt mehr Fasernenden als ein zackiger, erzwungener Schnitt.
Kanten vor dem Versiegeln schneiden
Hier ist eine Technik, die Anfänger von Profis unterscheidet. Bevor Sie überhaupt mit der Installation des Gewebes beginnen, ziehen Sie eine dünne Linie klaren Bastelklebers entlang jeder Schnittkante. Lassen Sie es einige Minuten trocknen. Dies erzeugt eine unsichtbare Versiegelung, die die äußersten Fasern an Ort und Stelle hält. Wenn Sie dann das Gewebe dehnen und heften, widerstehen diese versiegelten Kanten dem Ausfransen dramatisch besser als unbehandelte.
Häufige Probleme mit dem Ausfransen beheben
| Problem | Wahrscheinliche Ursache | Lösung |
|---|---|---|
| Fasern spalten sich an der Schnittlinie | Stumpfe Klinge oder trockenes Material | Klinge schärfen/ersetzen; Gewebe erneut einweichen |
| Kanten reißen beim Dehnen auf | Keine Vorversiegelung angewendet | Bastelkleber vor der Installation auf die Schnittkanten auftragen |
| Rohr bricht beim Biegen um den Rahmen | Unzureichende Einweichzeit | Länger einweichen (45-60 Min.); Glycerin zum Wasser hinzufügen |
| Oberflächenfasern lösen sich bei der Handhabung | Übergetrocknetes Gurtband | Leicht mit Sprühflasche besprühen; feuchtes Tuch bereithalten |
| Stränge lösen sich aus dem Webmuster | Bearbeitung eines zu großen Abschnitts | 2-3 Stränge gleichzeitig bearbeiten; Stifte zum Festhalten verwenden |
Während der Arbeit feucht halten
Das Gurtband nicht einweichen und dann eine Stunde lang weggehen, bevor Sie beginnen. Sobald Sie es aus dem Wasser nehmen, läuft die Zeit. Arbeiten Sie in kleinen Abschnitten. Halten Sie eine Sprühflasche bereit und besprühen Sie das Rohrrohr leicht, wenn es während der Installation zu trocknen beginnt. Einige Installateure legen ein feuchtes Handtuch über den Teil, an dem sie noch nicht arbeiten. Diese einfache Gewohnheit verhindert 90% von Ausfransungen mitten in der Installation.
Wenn das Gurtband richtig feucht installiert wird, schrumpft es beim Trocknen. Diese natürliche Straffung ist Ihr Freund. Es zieht das Gewebe straff gegen den Rahmen und zieht die Fasern enger zusammen. Lassen Sie das Stück über Nacht trocknen – mindestens 24 Stunden –, bevor Sie es trimmen oder eine Oberflächenbehandlung auftragen.
Was sind die professionellen Geheimnisse, um eine nahtlose Kante auf meinen Rattanmöbeln zu erzielen?
Wenn uns unsere Großhandelskunden in den Niederlanden Fotos ihrer fertigen Stücke schicken, können wir sofort erkennen, wer die Randarbeiten gemeistert hat und wer noch lernt. Der Unterschied liegt nie an der Qualität des Gurtbandes – es geht um die Technik. Und die gute Nachricht ist, dass jedes "Geheimnis" erlernbar ist. Wir haben die Methoden zusammengestellt, die unsere besten Werkspartner täglich anwenden.
Professionelle nahtlose Ränder entstehen durch die Kombination von präziser Rahmenvorbereitung (rückseitig abgeschrägte Aussparungen), sorgfältigem Feuchtigkeitsmanagement (einweichen, feucht verlegen, über Nacht trocknen lassen), fachmännischer Umrandung mit glänzseitig nach außen gerichtetem Rohr, sorgfältigem Einstecken loser Enden mit einer Ahle und einem abschließenden leichten Besprühen, um das Geflecht vor dem Versiegeln zu straffen.

Beginnen Sie mit dem Rahmen, nicht mit dem Rohrrohr
Die Qualität des Randes wird bestimmt, bevor der erste Strang den Rahmen berührt. Professionelle Restauratoren und Möbelhersteller bereiten immer zuerst den Rahmen vor. Das bedeutet, raue Kanten zu schleifen, saubere Nuten für die Leiste zu fräsen, gleichmäßig verteilte Löcher für die Hand-Rohrverarbeitung zu bohren oder präzise Aussparungen für eingelegte Paneele zu schneiden. Wenn der Rahmen rau, uneben oder schlecht vermessen ist, wird keine Menge an Rohrverarbeitung ihn reparieren.
Rückenschrägung ist eine Technik, die viele DIY-Tutorials überspringen, die aber jeder Profi verwendet. Indem Sie die Innenkante der Rahmenöffnung mit einer subtilen 45-Grad-Schräge versehen, schaffen Sie eine glatte Übergangszone. Das Geflecht wickelt sich natürlich um diese Schräge, anstatt sich an einer scharfen 90-Grad-Ecke zu stauen oder zu falten. Das Ergebnis ist ein Rand, der geformt und nicht gezwungen aussieht.
Die Glänzende Seite Regel
Jeder Strang Rattanrohr hat zwei Seiten – eine glänzende äußere Rindenseite und eine rauere innere Markseite. Halten Sie immer die glänzende Seite nach oben und außen. Dies gilt sowohl für die gewebte Geflechtfläche als auch für jedes Bindrohr, das zur Kantenbearbeitung verwendet wird. Die glänzende Seite ist haltbarer, attraktiver und nimmt Oberflächenbehandlungen gleichmäßiger an. Das Vermischen der Seiten ist einer der häufigsten Amateurfehler, die wir sehen.
Ahlenarbeit und Einstecken
Eine Ahle ist das wichtigste Werkzeug für nahtlose Ränder. Nach dem Binden oder Umwickeln von Kanten gibt es immer lose Enden, die versteckt werden müssen. Verwenden Sie die Ahle, um benachbarte Stränge anzuheben, das lose Ende darunter zu schieben und alles flach zu drücken. Diese Einstecktechnik eliminiert sichtbare Start- oder Endpunkte im Bindematerial. Gut gemacht sieht der Rand wie eine einzige, ununterbrochene Rohrschnur aus.
Der Über Nacht Straffungs-Trick
Sprühen Sie nach der Installation sowohl die Ober- als auch die Unterseite des Geflechts leicht mit Wasser ein. Lassen Sie das Stück dann über Nacht in einem gut belüfteten Raum trocknen – keine direkte Hitze, kein Sonnenlicht. Wenn das Rohr trocknet, zieht es sich zusammen. Diese natürliche Schrumpfung zieht das Geflecht straff und zieht den Rand fest an den Rahmen. Viele Profis bewerten ihre Randarbeiten erst, wenn dieser Trocknungsschritt abgeschlossen ist, da das endgültige gestraffte Ergebnis oft deutlich besser aussieht als die frisch installierte Version.
Moderne Hybridansätze
Im Jahr 2025 sehen wir eine wachsende Nachfrage nach hybriden Randbehandlungen, die traditionelle Rattanhandwerkskunst mit zeitgenössischem Design verbinden. Einige unserer Kunden kombinieren Rattan-Geflecht mit dünnen Messingstreifen entlang der Kante für einen industriell-modernen Look. Andere verwenden Lederkordeln oder kontrastierende Holzfurniere als Kantenband. Diese Ansätze schaffen unverwechselbare Designmerkmale und verbergen gleichzeitig effektiv rohe Kanten.
Der umweltfreundliche Aspekt ist ebenfalls stark im Trend. Immer mehr Hersteller wählen das natürliche Wassereinweichen gegenüber chemischen Versteifungsmitteln. Sie bevorzugen Bienenwachs gegenüber synthetischen Versiegelungen. Und sie vermarkten stolz die handgefertigte Natur ihrer Rattanmöbel – einschließlich der Kantenbearbeitung – als Verkaufsargument. Dies stimmt mit dem überein, was wir von Einkaufsmanagern aus ganz Europa und dem Nahen Osten hören, die uns sagen, dass ihre Endkunden aktiv nach handwerklichen, nachhaltig hergestellten Produkten suchen.
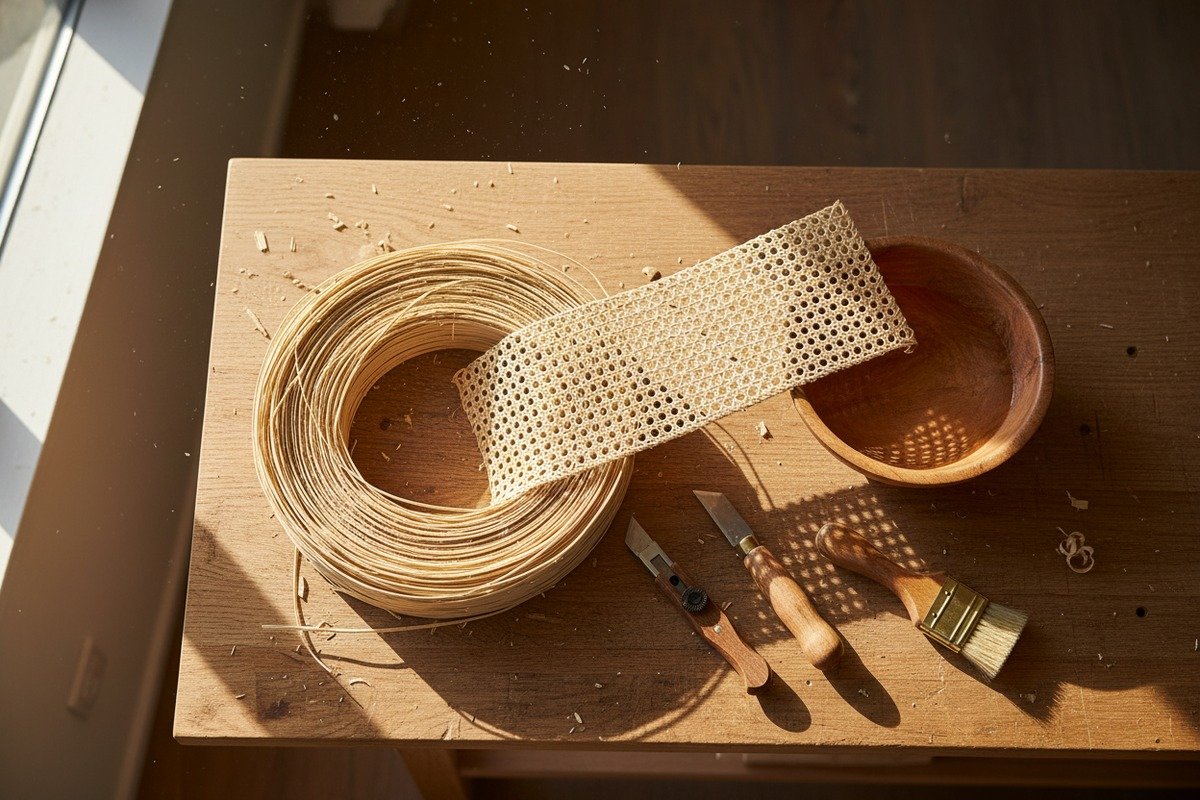
Wesentliches Werkzeugset für Randarbeiten
Jede Werkstatt benötigt einen Kernsatz von Werkzeugen für die professionelle Rattan-Kantenbearbeitung. Hier ist, was wir basierend auf dem Feedback von über 30 Partnerfabriken empfehlen.
- Scharfes Cuttermesser oder Bastelscheren
- Ahle (spitz, konisch)
- Holz- oder Kunststoffstifte zum Halten von Strängen
- Falzroller (für Nutenrahmen)
- Sprühflasche zum Nebeln
- Weichborstenpinsel zum Auftragen von Oberflächenbehandlungen
- Maßband
- Schleifpapier mit feiner Körnung zur Vorbereitung des Rahmens
Wenn diese Werkzeuge vor Beginn organisiert und griffbereit sind, werden Unterbrechungen vermieden, die dazu führen, dass das Rohr während des Projekts austrocknet. Vorbereitung ist das eigentliche Geheimnis des Profis. Alles andere ergibt sich daraus.
Conclusion
Die professionelle Veredelung von Rattankanten beruht auf Vorbereitung, den richtigen Materialien und Geduld. Vor dem Schneiden einweichen, vor dem Installieren versiegeln, mit Bindung oder Besatz verbergen und die Natur die endgültige Straffung über Nacht erledigen lassen. Diese Schritte verwandeln rohe Kanten jedes Mal in nahtlose Ränder.
Fußnoten
1. Wikipedia ist eine maßgebliche Quelle, die einen umfassenden Überblick über Rohrgewebe im Kontext von Möbeln bietet. ↩︎
2. Definiert Rohrschnur und ihre Anwendung zur Befestigung von Gewebe. ↩︎
3. Erklärt die Eigenschaften und Verwendungszwecke von Holzleim. ↩︎
4. Beschreibt das Binden von Rohren und seine Verwendung bei der Möbelreparatur. ↩︎
5. Beschreibt das Ahlenwerkzeug und seine verschiedenen Anwendungen. ↩︎
6. Erklärt Schellack als schützende Oberflächenbehandlung für Rohre. ↩︎
7. Diskutiert Polyurethan als strapazierfähige Oberflächenbehandlung für Rohre. ↩︎
8. Bietet Informationen über Anilinfarbstoffe zum Färben natürlicher Fasern. ↩︎
9. Erklärt die Rolle von Glycerin bei der Erweichung von Rohr für das Weben. ↩︎
10. Allgemeine Informationen über Cuttermesser und ihre Verwendung. ↩︎

