After years of shipping rattan cane webbing 1 rolls to furniture makers across Europe, America, and the Middle East, we have watched countless beautiful projects fall short at the very last step — the edges. Frayed strands, visible staples, and cracked borders can ruin an otherwise stunning piece. It is a problem we hear about weekly from our wholesale clients. And it is entirely preventable.
Finishing rattan cane webbing edges professionally requires soaking the material for flexibility, securing it with binding cane or spline, trimming excess with sharp tools, and sealing with thinned polyurethane or shellac. Proper moisture management and concealment techniques create clean, durable, gallery-worthy borders.
In this guide, we break down the exact methods our furniture factory clients use to achieve flawless rattan edges. Whether you are a purchasing manager sourcing materials or a workshop team doing hands-on installation, every technique below is tested and proven. Let us walk through it step by step.
How do I hide the raw edges of my rattan cane webbing for a clean look?
When we first started supplying pre-woven cane webbing sheets to furniture factories in the Netherlands and Spain, the most common complaint was not about the weave quality — it was about ugly, raw cut edges showing on the finished product. Buyers would call frustrated, wondering how to make the borders disappear.
To hide raw edges, apply decorative wood trim, cane spline, or round reed over the exposed cuts. Secure these covering materials with small nails, wood glue, or by pressing spline into a routed groove with a spline roller. This conceals fasteners and creates a polished, seamless border.

Understanding Your Concealment Options
There are several proven methods to hide raw edges. Your choice depends on the furniture style, frame design, and the look you want. Here is a breakdown of the most common approaches.
| Method | Best For | Tools Needed | Difficulty |
|---|---|---|---|
| Cane spline 2 in routed groove | Inset panels (chair seats, cabinet doors) | Spline roller, chisel, glue | Medium |
| Decorative wood trim | Flat panel applications, headboards | Small nails, hammer, wood glue 3 | Easy |
| Round reed overlay | Traditional caned chairs | Awl, pegs, glue | Medium |
| Binding cane 4 wrap | Hand-caned frames with holes | Awl, pegs, 4mm binding cane | Advanced |
| Metal or leather edging | Modern/industrial designs | Adhesive, small screws | Easy |
The Spline Method
For furniture with routed grooves around the panel opening, cane spline is the gold standard. You press the webbing into the groove, then push the spline in on top of it using a spline roller. This locks the webbing in place and hides every raw strand. Apply a thin line of wood glue inside the groove before inserting the spline for permanent hold. The result is a clean, flush surface with no visible hardware at all.
The Trim Overlay Method
When working with flat surfaces — like the back of a headboard or a cabinet door panel — decorative wood trim is the simplest solution. Staple the webbing to the back of the frame first. Then nail or glue a thin wooden moulding strip over the stapled edge. This covers everything. Many of our clients in Australia and the USA prefer this approach for its simplicity and the design flexibility it offers. You can paint or stain the trim to match or contrast with the rattan.
Back-Beveling for Flush Panels
One professional trick we share with our factory partners is back-beveling. Before installation, cut a subtle recess along the inner edge of the frame. This allows the webbing to sit slightly below the surface. When you apply trim or spline over it, everything sits flush. There is no ridge, no bump, and no visible transition between rattan and wood. It looks like the webbing grew there naturally.
Binding Cane for Traditional Frames
For chairs with drilled holes around the seat opening — the classic Thonet style — use 4mm narrow binding cane. Thread it through the holes over the top of the woven strands. Keep the glossy side facing out. Use an awl 5 to lift and tuck loose ends underneath. This method has been used for over a century and still produces the cleanest traditional finish.
Which finishing materials should I use to secure my rattan edges permanently?
Through years of testing across our three factories — including our own rattan processing facility in Indonesia — we have seen every finishing material perform under real-world conditions. Some hold up beautifully. Others crack, yellow, or peel within months. The difference comes down to choosing the right product and applying it correctly.
Use thinned polyurethane, shellac, or clear varnish to seal rattan edges permanently. Apply in light, even coats to avoid cracking. For color customization, aniline dyes work well on natural cane. Wood glue or clear craft adhesive secures structural joints, while beeswax offers a natural, low-sheen alternative.

Sealants and Protective Finishes
The debate between leaving rattan unfinished and sealing it is real. Traditionalists argue that unsealed cane breathes better. It absorbs and releases moisture, which keeps the fibers flexible over decades. Modernists counter that a thinned sealant protects against UV damage, staining, and premature wear — especially in commercial furniture that sees heavy daily use.
Our recommendation to wholesale clients sits in the middle. For indoor residential furniture, a light coat of thinned shellac 6 preserves the natural color while adding minimal surface protection. For commercial or outdoor-adjacent pieces, thinned polyurethane 7 provides better durability. The key word is "thinned." Heavy coats crack as the rattan expands and contracts with humidity changes.
Material Comparison
| Material | Protection Level | Appearance | Drying Time | Best Use Case |
|---|---|---|---|---|
| Thinned polyurethane | High | Slight gloss, warm tone | 4-6 hours per coat | Commercial furniture, high-traffic pieces |
| Shellac | Medium | Natural warm amber | 1-2 hours per coat | Indoor residential, vintage restorations |
| Clear varnish | High | Variable sheen options | 6-8 hours per coat | Outdoor-adjacent furniture |
| Beeswax | Low | Matte, natural | Immediate | Artisanal, eco-conscious projects |
| Aniline dye + sealant | High | Custom color | Varies | Designer furniture, branded products |
Adhesives for Structural Securing
Beyond surface finishes, you need adhesives to lock edges in place permanently. Standard wood glue (PVA-based) works well for pressing spline into grooves and attaching trim. For the webbing edges themselves, a thin line of clear craft glue applied to raw cut ends before installation prevents fiber separation over time. Some of our factory partners in Turkey and Greece use a combination — craft glue on raw edges during installation, followed by a polyurethane seal once everything dries.
The Staining Trend
In 2025, custom-colored rattan is surging in popularity. We are shipping more bleached and pre-dyed webbing than ever before. But many furniture makers prefer to stain webbing after installation for exact color matching. Aniline dyes 8 penetrate natural fibers evenly without obscuring the woven texture. Apply dye first, let it dry completely, then seal with a thinned topcoat. This layered approach gives the most control over the final look.
Application Tips
Always test your finish on a scrap piece of the same webbing batch. Rattan absorbs finishes differently depending on species, age, and weave density. Use a soft brush or lint-free cloth. Apply in the direction of the weave, not against it. Two thin coats always outperform one thick coat. Allow full drying between coats — rushing this step is the number one cause of finish failure we see from clients.
How can I prevent my cane webbing from fraying during the installation process?
One of our most experienced production supervisors in Foshan once told me something that stuck: "Fraying does not happen because of bad rattan. It happens because of bad preparation." After watching thousands of sheets get cut and installed across our partner factories, we can confirm that almost every fraying problem traces back to a skipped or rushed preparation step.
Prevent fraying by soaking rattan webbing in warm water for 30-60 minutes before cutting, using only sharp scissors or utility knives, and applying a thin line of clear craft glue or fabric sealant to cut edges immediately. Keep the material damp throughout installation and work in small sections.

The Soaking Step You Cannot Skip
Dry rattan is brittle rattan. When you cut dry cane, fibers split and separate. When you bend it, it snaps. Soaking in warm water for 30 minutes softens the natural fibers and makes them pliable. The cane becomes forgiving. It bends without breaking and cuts cleanly without shredding.
Some professionals add a small amount of glycerine 9 to the soak water. This is a niche technique, but it does improve pliability further. The glycerine acts as a humectant, helping fibers retain moisture longer during the installation process. We have tested this in our Indonesian processing facility, and the difference is noticeable — especially with thicker weaves.
Sharp Tools Are Non-Negotiable
Dull blades tear fibers instead of cutting them. This single factor causes more fraying than any other. Use sharp scissors, a fresh utility knife 10 blade, or craft shears. Replace blades frequently during large projects. A clean, decisive cut seals more fiber ends than a ragged, forced one.
Pre-Sealing Cut Edges
Here is a technique that separates beginners from professionals. Before you even start installing the webbing, run a thin line of clear craft glue along every cut edge. Let it dry for a few minutes. This creates an invisible seal that locks the outermost fibers in place. When you then stretch and staple the webbing, those sealed edges resist fraying dramatically better than untreated ones.
Troubleshooting Common Fraying Issues
| Problem | Likely Cause | Solution |
|---|---|---|
| Fibers splitting at cut line | Dull blade or dry material | Sharpen/replace blade; re-soak webbing |
| Edges unraveling during stretching | No pre-seal applied | Apply craft glue to cut edges before installation |
| Cane cracking when bent around frame | Insufficient soaking time | Soak longer (45-60 min); add glycerine to water |
| Surface fibers lifting during handling | Over-dried webbing | Mist lightly with spray bottle; keep damp cloth nearby |
| Strands pulling loose from weave pattern | Working with too large a section | Handle 2-3 strands at a time; use pegs to hold |
Keeping Damp During Work
Do not soak the webbing and then walk away for an hour before starting. Once you remove it from water, the clock is ticking. Work in small sections. Keep a spray bottle nearby and mist the cane lightly if it starts drying during installation. Some installers drape a damp towel over the portion they are not yet working on. This simple habit prevents 90% of mid-installation fraying.
When the webbing is properly installed while damp, it shrinks as it dries. This natural tightening is your friend. It pulls the weave taut against the frame and draws the fibers together more tightly. Let the piece dry overnight — at least 24 hours — before trimming or applying any finish.
What are the professional secrets to achieving a seamless border on my rattan furniture?
When our wholesale clients in the Netherlands send us photos of their finished pieces, we can immediately tell who has mastered the border work and who is still learning. The difference is never about the webbing quality — it is about technique. And the good news is that every "secret" is learnable. We have compiled the methods our best factory partners use daily.
Professional seamless borders come from combining precise frame preparation (back-beveled recesses), careful moisture management (soak, install damp, dry overnight), expert binding with glossy-side-out cane, meticulous tucking of loose ends with an awl, and a final light misting to tighten the weave before sealing.

Start With the Frame, Not the Cane
The border quality is determined before the first strand touches the frame. Professional restorers and furniture makers always prepare the frame first. This means sanding any rough edges, routing clean grooves for spline, drilling evenly spaced holes for hand-caning, or cutting precise recesses for inset panels. If the frame is rough, uneven, or poorly measured, no amount of cane work will fix it.
Back-beveling is one technique that many DIY tutorials skip but every professional uses. By cutting a subtle 45-degree bevel on the inner edge of the frame opening, you create a smooth transition zone. The webbing wraps around this bevel naturally instead of bunching or folding at a sharp 90-degree corner. The result is a border that looks molded rather than forced.
The Glossy Side Rule
Every strand of rattan cane has two sides — a glossy outer bark side and a rougher inner pith side. Always keep the glossy side facing up and outward. This applies to both the woven webbing surface and any binding cane used for edge finishing. The glossy side is more durable, more attractive, and takes finishes more evenly. Mixing up the sides is one of the most common amateur mistakes we see.
Awl Work and Tucking
An awl is the most important tool for seamless borders. After binding or wrapping edges, there are always loose ends that need to be hidden. Use the awl to lift adjacent strands, slide the loose end underneath, and press everything flat. This tucking technique eliminates any visible starting or stopping points in the binding. When done well, the border looks like one continuous, unbroken line of cane.
The Overnight Tightening Trick
After installation, mist both the top and bottom surfaces of the webbing lightly with water. Then let the piece dry overnight in a well-ventilated room — no direct heat, no sunlight. As the cane dries, it contracts. This natural shrinkage pulls the weave tight and draws the border snug against the frame. Many professionals will not even evaluate their border work until this drying step is complete because the final tightened result often looks significantly better than the freshly installed version.
Modern Hybrid Approaches
In 2025, we are seeing growing demand for hybrid border treatments that blend traditional rattan craft with contemporary design. Some of our clients combine rattan webbing with thin brass strips along the edge for an industrial-modern look. Others use leather cording or contrasting wood veneer as edge banding. These approaches create distinctive design features while still hiding raw edges effectively.
The eco-friendly angle is also trending strongly. More makers are choosing natural water soaking over chemical stiffeners. They prefer beeswax over synthetic sealants. And they are proudly marketing the handcrafted nature of their rattan furniture — including the edge finishing work — as a selling point. This aligns with what we hear from purchasing managers across Europe and the Middle East who tell us their end customers are actively seeking artisanal, sustainably made products.
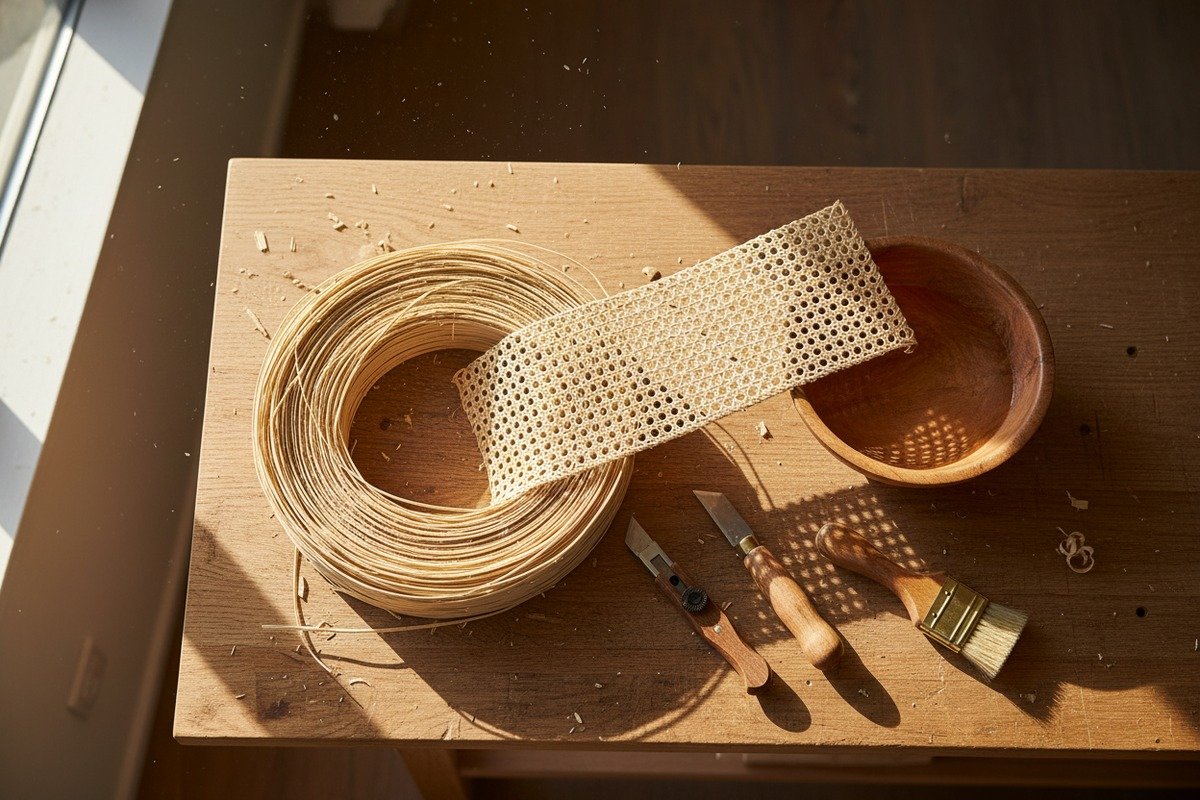
Essential Tool Kit for Border Work
Every workshop needs a core set of tools for professional rattan edge finishing. Here is what we recommend based on feedback from over 30 partner factories.
- Sharp utility knife or craft shears
- Awl (pointed, tapered)
- Wooden or plastic pegs for holding strands
- Spline roller (for grooved frames)
- Spray bottle for misting
- Soft-bristle brush for applying finishes
- Measuring tape
- Fine-grit sandpaper for frame prep
Having these tools organized and within reach before starting eliminates interruptions that let the cane dry out mid-project. Preparation is the real professional secret. Everything else follows from it.
Conclusion
Professional rattan edge finishing comes down to preparation, the right materials, and patience. Soak before cutting, seal before installing, conceal with binding or trim, and let nature do the final tightening overnight. These steps transform raw edges into seamless borders every time.
Footnotes
1. Wikipedia is an authoritative source that provides a comprehensive overview of cane webbing in the context of furniture. ↩︎
2. Defines cane spline and its application in securing webbing. ↩︎
3. Explains the properties and uses of wood glue. ↩︎
4. Describes binding cane and its use in furniture repair. ↩︎
5. Describes the awl tool and its various applications. ↩︎
6. Explains shellac as a protective finish for cane. ↩︎
7. Discusses polyurethane as a durable finish for cane. ↩︎
8. Provides information on aniline dyes for coloring natural fibers. ↩︎
9. Explains glycerine’s role in softening cane for weaving. ↩︎
10. General information about utility knives and their uses. ↩︎

