Small cracks in rattan cane webbing 1 can feel like the beginning of the end for a beautiful piece of furniture. Over the years, working across our three factories and processing facility in Indonesia, we have seen thousands of rattan sheets arrive with tiny stress fractures—sometimes from dry storage, sometimes from rough handling during transit. The problem is real, and it frustrates wholesalers and furniture makers alike.
To repair small cracks in rattan cane webbing, soak the damaged area with warm water for 20–30 minutes to restore flexibility, then apply wood glue or a rattan-specific adhesive to the crack. Press the strands back into position, reinforce from the underside if needed, and let the piece dry for 24 hours before use.
The good news is that not every crack means a full replacement. In many cases, a targeted repair can extend the life of your rattan webbing by years. Below, we walk through the most common questions our buyers ask about cracks—how to fix them, how to prevent them, and how to tell if the material itself is the problem.
How can I fix small cracks in my rattan cane webbing without replacing the whole sheet?
This is the question we hear most often from furniture factories and wholesalers in the US and Europe. A single cracked strand on an otherwise perfect sheet feels wasteful to replace entirely. And in most cases, it is.
You can fix small cracks without replacing the whole sheet by soaking the damaged area, trimming frayed strands, weaving in a matching replacement strand, and securing everything with wood glue. Reinforce the repair from the underside with a mesh patch for added durability.

Assess the Damage First
Before you pick up any tools, take a close look at the crack. Is it a single broken strand? A hairline surface crack? Or a cluster of fractures across multiple strands? The answer determines your approach.
A single broken strand in the weave pattern 2 is the easiest to fix. You simply weave a new strand into the existing pattern. A hairline surface crack—where no strand is fully broken—may only need adhesive and moisture treatment. But if you see cracks spreading across three or more strands in a load-bearing area, full replacement of that section might be the smarter choice.
Step-by-Step Repair Process
Here is a simple process that works for most minor cracks:
- Clean the area. Wipe the damaged spot with a damp cloth and mild soap. Remove all dust and debris.
- Soak the damaged section. Use a spray bottle or damp towel to apply warm water directly to the cracked area. Let it sit for 20–30 minutes. This restores flexibility to the dried-out rattan fibers.
- Trim frayed ends. Use sharp scissors or a utility knife 3 to cleanly cut any loose or frayed strand ends. A clean edge bonds better with adhesive.
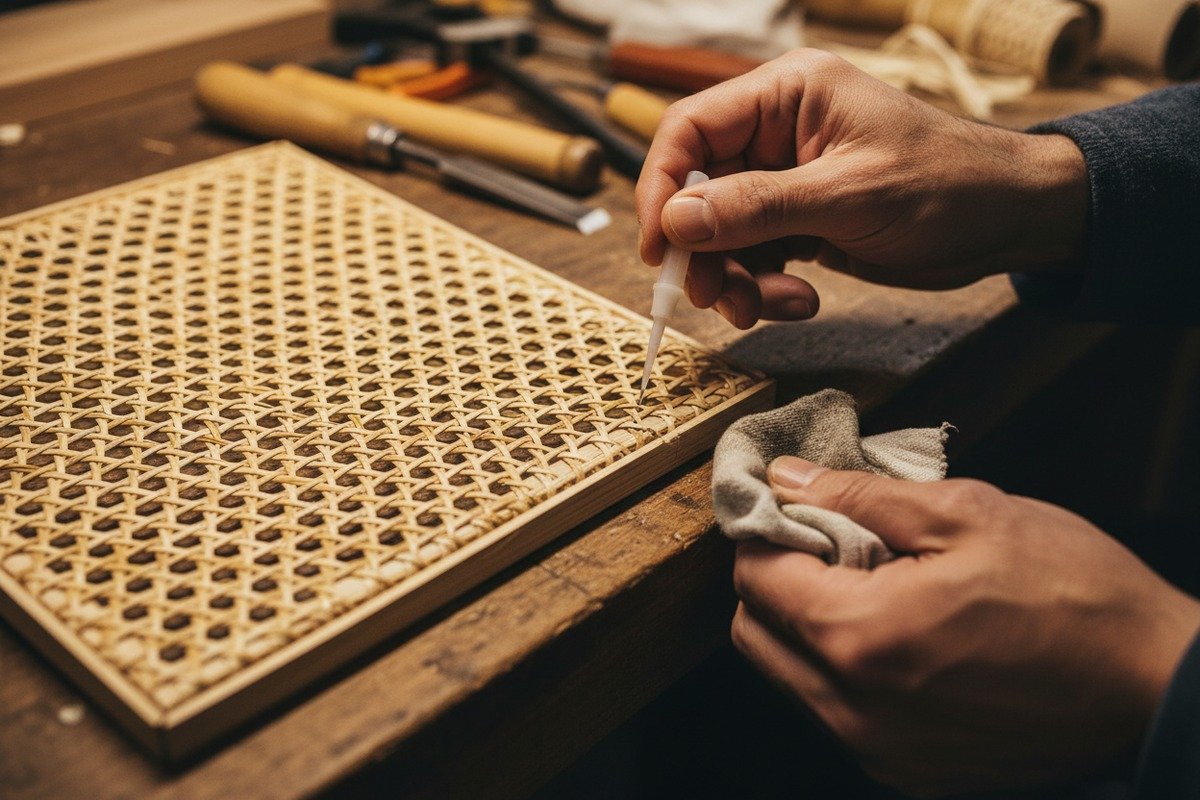
- Apply adhesive. For natural rattan, wood glue 4 (PVA glue) works best. Apply a thin layer to the crack and press the strands back into their original position.
- Weave in a replacement strand (if needed). If a strand is fully broken, soak a new matching cane strand for 30 minutes, then carefully thread it through the existing weave pattern. Secure the ends with glue.
- Reinforce from underneath. Cut a small piece of fine mesh or cotton fabric. Glue it to the underside of the repair area. This adds structural support, especially in areas that bear weight.
- Dry for 24 hours. Do not move, sit on, or stress the repaired area until the glue has fully cured.
When to Repair vs. When to Replace
| Situation | Recommended Action | Reason |
|---|---|---|
| Single broken strand in decorative area | Localized repair | Low stress, easy to weave in new strand |
| Hairline surface crack, no broken strands | Adhesive + moisture treatment | Strand integrity intact |
| 1–2 broken strands in seat area | Repair with underside reinforcement | Reinforcement compensates for stress |
| 3+ broken strands clustered together | Replace the sheet section | Structural integrity compromised |
| Widespread brittleness across the sheet | Full replacement | Material has reached end of life |
This table helps our clients make fast decisions on their production lines. It saves time and reduces material waste.
What steps should I take to prevent my rattan webbing from cracking during the manufacturing process?
In our production facilities, we learned early on that prevention is always cheaper than repair. Every cracked sheet that comes off a production line is wasted material and wasted labor. Getting the process right from the start matters more than any repair technique.
To prevent rattan webbing from cracking during manufacturing, maintain workshop humidity between 50–70%, always pre-soak cane before cutting or bending, avoid over-tightening during installation, and never apply heat directly to dry rattan. Proper storage in climate-controlled environments is equally critical.

Humidity Is Everything
Rattan is a natural fiber 6. It absorbs and releases moisture constantly. When the air is too dry, the strands shrink and become brittle. When it is too humid, they can swell and warp. The sweet spot for working with rattan webbing is 50–70% relative humidity 7.
In our Foshan workshop, we use industrial humidifiers during the dry winter months. Our partner factories in Indonesia have the opposite problem—too much moisture during the rainy season—so they use dehumidifiers and controlled drying rooms.
Pre-Soaking Protocol
Every sheet of cane webbing should be soaked in warm water for 20–30 minutes before any cutting, bending, or stretching. This is non-negotiable. Dry cane snaps. Wet cane bends. It is that simple.
Some factories try to skip this step to save time. They end up with cracked sheets and frustrated clients. We always tell our buyers: if your factory is not soaking the cane, that is where your cracks are coming from.
Common Manufacturing Mistakes
| Mistake | What Happens | How to Prevent It |
|---|---|---|
| Skipping the soak | Cane snaps during stretching | Always soak 20–30 minutes in warm water |
| Over-tightening in the groove | Strands crack at the edge | Pull snug, not tight; let the spline do the work |
| Using a heat gun to speed drying | Fibers dry unevenly and crack | Allow natural air drying for 24 hours |
| Storing sheets in direct sunlight | UV degrades fibers over time | Store in shaded, ventilated area |
| Stacking heavy items on rolled sheets | Crush damage creates micro-cracks | Store rolls upright or on padded shelves |
Handling and Cutting Best Practices
Use sharp tools. A dull blade tears the fiber instead of cutting it, which creates stress points that develop into cracks later. When trimming webbing to size, always cut 1–2 inches larger than the final dimension. This gives you working room and reduces strain at the edges.
When pressing the spline into the groove, apply steady, even pressure. Hammering too hard creates impact fractures in the cane where it bends over the groove edge. A rubber mallet works better than a metal hammer. And always work the spline in short sections rather than trying to press the entire length at once.
Post-Installation Care
After installation, let the piece dry naturally for at least 24 hours. Do not place it near heaters, air conditioning vents, or open windows where temperature and humidity fluctuate rapidly. The cane needs time to settle into its new shape. Rushing this step is one of the most common causes of early cracking.
How do I identify if the cracks in my rattan material are due to low-grade quality or improper storage?
We ship rattan webbing to over a dozen countries, and quality disputes sometimes happen. The key question is always the same: did the material arrive defective, or did something go wrong after delivery? Knowing how to tell the difference protects both the buyer and the supplier.
Low-grade rattan shows uneven strand thickness, visible knots, dark spots, and brittleness even when freshly soaked. Storage-related cracks appear as uniform drying patterns, often at fold lines or edges, and the material typically regains flexibility after soaking. Inspect both the fiber quality and the crack pattern to determine the cause.

Signs of Low-Grade Rattan
Not all rattan is created equal. Grade A rattan has consistent strand diameter, smooth surfaces, and a uniform light color. Lower grades show clear visual and physical differences.
Look for these indicators of low-quality material:
- Uneven strand thickness. Strands that vary noticeably in diameter within the same sheet suggest the rattan was harvested from immature or mixed-age canes.
- Visible knots and nodes. While small nodes are natural, excessive or large knots weaken the strand at those points.
- Dark discoloration. Brown or black spots can indicate fungal damage or improper initial drying at the processing stage.
- Brittleness when soaked. Good rattan becomes pliable after soaking. If it still snaps after 30 minutes in warm water, the fiber quality is poor.
- Inconsistent weave tension. A well-made sheet has even spacing and tension. Loose or wavy sections suggest lower manufacturing standards.
Signs of Storage Damage
Storage-related cracks look different from quality defects. Here is what to watch for:
- Cracks along fold lines. If the sheet was folded instead of rolled for storage, stress fractures appear exactly at the fold.
- Uniform brittleness across the sheet. When the entire sheet is equally dry and brittle, it usually means prolonged exposure to low humidity rather than a material defect.
- Edge cracking only. Edges exposed to air dry out faster than the center. If cracks are concentrated at the edges, storage conditions are likely the cause.
- Musty smell or mold. Overly humid storage causes mold growth, which degrades fiber strength.
Quick Diagnostic Table
| Indicator | Low-Grade Quality | Improper Storage |
|---|---|---|
| Strand thickness | Uneven, varies within sheet | Consistent |
| Color | Dark spots, discoloration | Uniform but may be faded |
| Flexibility after soaking | Still brittle | Regains flexibility |
| Crack location | Random, often near knots | At folds, edges, or uniformly |
| Weave consistency | Loose, uneven spacing | Tight, original pattern intact |
| Smell | Chemical or off odor | Musty or dry wood scent |
What to Do When You Suspect Quality Issues
If you are a furniture factory or wholesaler receiving a shipment, document everything before opening more than one roll. Take photos of the packaging condition, the roll itself, and close-up shots of any cracks or discoloration.
At our company, we encourage buyers to send us photos and videos within 48 hours of receiving a shipment. This helps us trace the issue back to the specific production batch. We also keep retention samples from every batch for exactly this reason.
If the rattan regains flexibility after soaking but was too dry upon arrival, the issue is likely shipping or storage conditions—not the material itself. If it remains brittle after soaking, the fiber grade needs to be reviewed with the supplier.
A Note on Grading Standards
There is no universal grading standard for rattan webbing across the industry. What one supplier calls "Grade A" might be another's "Grade B." This is why we always recommend requesting samples before placing bulk orders. At our facility, we grade based on strand uniformity, weave tension, color consistency, and flexibility after a standard soak test.
Which tools and adhesives should I use to repair minor damage on my rattan furniture surfaces?
When our clients ask about repair supplies, we always emphasize that using the right tool for the job prevents further damage. We have seen well-intentioned repairs go wrong because someone used the wrong glue or a tool that was too aggressive for delicate cane strands.
For minor rattan repairs, use sharp scissors, a utility knife, a flathead screwdriver or tucking tool, fine-grit sandpaper, and a rubber mallet. The best adhesives are PVA wood glue for structural bonds, hide glue for antique pieces, and rattan-tinted filler paste for cosmetic hairline cracks. Avoid rigid adhesives like epoxy on flexible weave areas.

Essential Tools
You do not need an expensive toolkit to repair rattan. A few basic items will handle 90% of minor repairs.
- Sharp scissors or utility knife. For trimming frayed strands cleanly. Dull blades crush the fiber and create new stress points.
- Flathead screwdriver or tucking tool. For pushing loose strands back into position within the weave. A specialized cane tucking tool is ideal, but a small flathead works in a pinch.
- Spray bottle. For applying warm water to the damaged area without over-soaking surrounding sections.
- Rubber mallet. For gently tapping spline back into grooves without creating impact fractures.
- Fine-grit sandpaper (220 grit or higher). For smoothing hairline surface cracks before applying sealant.
- Small clamps or clothespins. For holding glued strands in position while the adhesive cures.
- Clean cotton cloths. For wiping excess glue and applying moisture.
Choosing the Right Adhesive
The adhesive you choose depends on the type of repair and the type of rattan.
| Adhesive Type | Best For | Drying Time | Flexibility After Cure | Notes |
|---|---|---|---|---|
| PVA Wood Glue | General structural repairs on natural rattan | 24 hours | Moderate | Most versatile option; cleans up with water |
| Hide Glue | Antique or valuable furniture | 12–24 hours | High | Reversible with moisture; preferred by restorers |
| Hot Glue | Quick temporary fixes | 2–5 minutes | Low | Not for permanent or load-bearing repairs |
| Super Glue (CA) | Tiny spot repairs on rigid areas | 30 seconds–2 minutes | Very low | Too brittle for flexible weave sections |
| Rattan Filler Paste | Cosmetic hairline cracks | 4–6 hours | Moderate | Can be tinted to match; for surface-only issues |
| Epoxy | Structural joints (not weave) | 1–24 hours | Very low | Too rigid for woven areas; good for frame joints |
Matching Your Repair to the Damage Type
For cosmetic hairline cracks where no strand is broken, lightly sand the surface with 220-grit sandpaper, apply a thin layer of rattan filler paste tinted to match the cane color, and let it dry. Once cured, you can apply a light coat of rattan conditioner or diluted linseed oil 8 to blend the repair.
For broken strands in the weave, PVA wood glue is your go-to. Apply it to both the broken ends and the new replacement strand. Work quickly—the glue starts setting within 10–15 minutes. Use clothespins or small clamps to hold everything in place while it dries.
For antique pieces where reversibility matters, hide glue is the professional choice. It bonds well, stays flexible, and can be softened with warm water if the repair ever needs to be redone. Many museum conservators use hide glue exclusively for this reason.
What About Synthetic Rattan?
Synthetic rattan 9 (made from PVC, polyethylene, or polypropylene) behaves differently. PVA wood glue does not bond well to plastic. For synthetic rattan repairs, use a flexible plastic adhesive or a specialized outdoor furniture repair glue. Hot glue can work for quick fixes on synthetic material, but it does not hold up in high temperatures.
Post-Repair Conditioning
After any repair on natural rattan, apply a rattan conditioner or a very light coat of diluted boiled linseed oil. This rehydrates the surrounding fibers and helps prevent future cracking near the repair site. Do not use varnish, polyurethane, or shellac. These seal the pores and make the rattan brittle over time.
For ongoing maintenance, wipe your rattan surfaces with a slightly damp cloth once a month. This simple habit keeps the fibers hydrated and flexible, extending the life of both the material and any repairs you have made.
Conclusion
Repairing small cracks in rattan cane webbing is straightforward when you understand the material, use the right tools, and address the root cause. Prevention through proper humidity, storage, and handling will always be more effective than repair after the fact.
Footnotes
1. Provides general information about rattan cane webbing as a material. ↩︎
2. Describes the structure and importance of the rattan weave pattern. ↩︎
3. Highlights the utility knife as an essential tool for clean cuts in various crafts. ↩︎
4. Explains the properties and uses of wood glue for furniture repair. ↩︎
5. Details the properties and uses of hide glue in woodworking. ↩︎
6. Authoritative source providing a definition and overview of natural fibers. ↩︎
7. Explains the critical role of humidity in natural fiber material integrity. ↩︎
8. Authoritative source providing a comprehensive overview of linseed oil. ↩︎
9. Provides information on the composition and properties of synthetic rattan. ↩︎
10. Offers a clear explanation of PVA glue and its uses. ↩︎

