Years of shipping rattan cane webbing 1 from our Foshan warehouse to furniture restorers worldwide have taught us one thing: most people throw away chairs that only need a simple seat replacement. That cracked, sagging cane seat staring at you from the garage is not trash. It is a weekend project waiting to happen. The problem is, bad advice leads to bad results—warped webbing, loose splines, and seats that sag again within months.
To refurbish an old chair with rattan cane webbing, remove the old cane and spline from the groove, clean out all residue, soak new sheet webbing and reed spline in warm water, press the wet webbing into the groove, apply glue, tap in the spline, trim the excess, and let it dry for 24 hours to shrink tight.
This guide walks you through every step, from picking the right webbing size to applying the final finish. Whether you are restoring a mid-century Cesca chair 2 or a vintage dining set, the process is straightforward once you know the details. Let’s get into it.
How do I choose the right size and grade of rattan cane webbing for my chair?
Picking the wrong webbing size is the single most common mistake we see when clients order from our catalog for their first restoration project. It leads to wasted material, poor fit, and frustration before you even start.
Choose rattan cane webbing by measuring your chair's seat opening and adding 1–2 inches of overlap on each side, then match the reed spline diameter to your groove width (commonly 1/4 inch). Select a webbing grade based on your desired weave pattern and the chair's intended use.

Measuring Your Chair's Seat Opening
Start with a tape measure. Measure the length and width of the seat opening from the inside edge of the groove on one side to the inside edge on the other. Write these numbers down. Then add 1 to 2 inches on every side. This extra material gives you enough webbing to press into the groove without running short.
For example, if your seat opening is 16 inches by 16 inches, order a piece that is at least 18 by 18 inches. When we cut webbing to order at our processing facility, we always recommend rounding up. It is far better to trim excess than to come up short mid-installation.
Matching Spline to Groove
The reed spline 3 must fit snugly inside the groove. Too large, and it will not seat properly. Too small, and it will pop out over time. Use a caliper or bring a small section of the old spline to compare. Most vintage chairs use a groove width between 3/16 inch and 1/4 inch.
| Groove Width | Recommended Spline Size | Common Chair Types |
|---|---|---|
| 3/16 inch (5mm) | #8 or #9 spline | Lightweight dining chairs, older European models |
| 1/4 inch (6mm) | #10 or #11 spline | Cesca chairs, standard mid-century seats |
| 5/16 inch (8mm) | #12 or #13 spline | Heavy-duty seats, larger armchairs |
Understanding Webbing Grades
Not all rattan webbing is the same. From our production lines in Indonesia, we process webbing in multiple grades. The grade a 4ffects appearance, durability, and price.
- Grade A (Bleached or Natural): Uniform color, minimal knots, smooth surface. Best for visible furniture in living rooms and dining areas.
- Grade B (Natural): Slight color variation, a few small knots. Good for painted or stained chairs where minor imperfections are hidden.
- Open Mesh vs. Close Weave: Open mesh patterns like the classic hexagonal "radio weave" are lighter and more breathable. Open Mesh vs. Close Weave 5 Close weave patterns like herringbone or basketweave offer more support and a denser look.
Weave Pattern Selection
Your chair's style should guide your pattern choice. A mid-century modern chair 6 pairs well with the classic open hexagonal weave. A rustic farmhouse chair may look better with a tight basketweave or diagonal twill.
| Weave Pattern | Best For | Visual Style |
|---|---|---|
| Hexagonal open mesh (radio weave) | Cesca chairs, mid-century seats | Light, airy, classic |
| Tight basketweave | Dining chairs, heavy-use seats | Dense, sturdy, traditional |
| Herringbone / diagonal twill | Accent chairs, decorative pieces | Textured, contemporary |
| Diamond lattice | Custom projects, statement furniture | Bold, geometric, modern |
When in doubt, bring a photo of your chair to your supplier. Our sales team handles this daily—matching patterns to chair styles is second nature after years of exporting to markets in the Netherlands, the US, Australia, and beyond.
What is the correct way for me to soak and install rattan webbing to prevent sagging?
When our factory team demonstrates rattan installation at trade shows, the number one question we hear is about sagging. People follow tutorials step by step and still end up with a loose seat. The issue almost always traces back to soaking time or installation technique.
Soak rattan cane webbing in warm water for 20 to 30 minutes and the reed spline for 5 to 15 minutes before installation. Center the wet sheet over the seat, press it into the groove starting from the front, then the back, then the sides, keeping the weave pattern square and aligned to prevent future sagging.

Why Soaking Matters
Dry rattan is brittle. If you try to press it into a groove without soaking, it will crack and split. Warm water softens the natural fibers 7, making them pliable enough to bend without breaking. The key is getting the timing right.
Over-soaking is just as bad as under-soaking. If you leave webbing in water for hours, the fibers absorb too much moisture and become mushy. They lose their structural integrity. When they dry, they can shrink unevenly and create a wavy, loose seat. Aim for 20 to 30 minutes in warm (not hot) water. The webbing should feel flexible but still have some firmness.
For the reed spline, 5 to 15 minutes is enough. The spline is denser and needs less time. If you soak it too long, it becomes soft and difficult to tap into the groove cleanly.
Step-by-Step Installation
Here is the process we recommend based on years of feedback from our wholesale clients who run furniture restoration workshops:
Step 1: Prepare the chair. Remove all old cane, spline, and glue from the groove. Use a razor knife to cut along the spline edges. Apply steam or hot water to soften old glue. Pry out the spline with a flathead screwdriver or awl. Scrape the groove clean with a small chisel. Every bit of old residue must come out.
Step 2: Soak the materials. Place the cut webbing sheet in a basin of warm water. Set a timer. After 20 to 30 minutes, remove it and lay it flat on a clean surface.
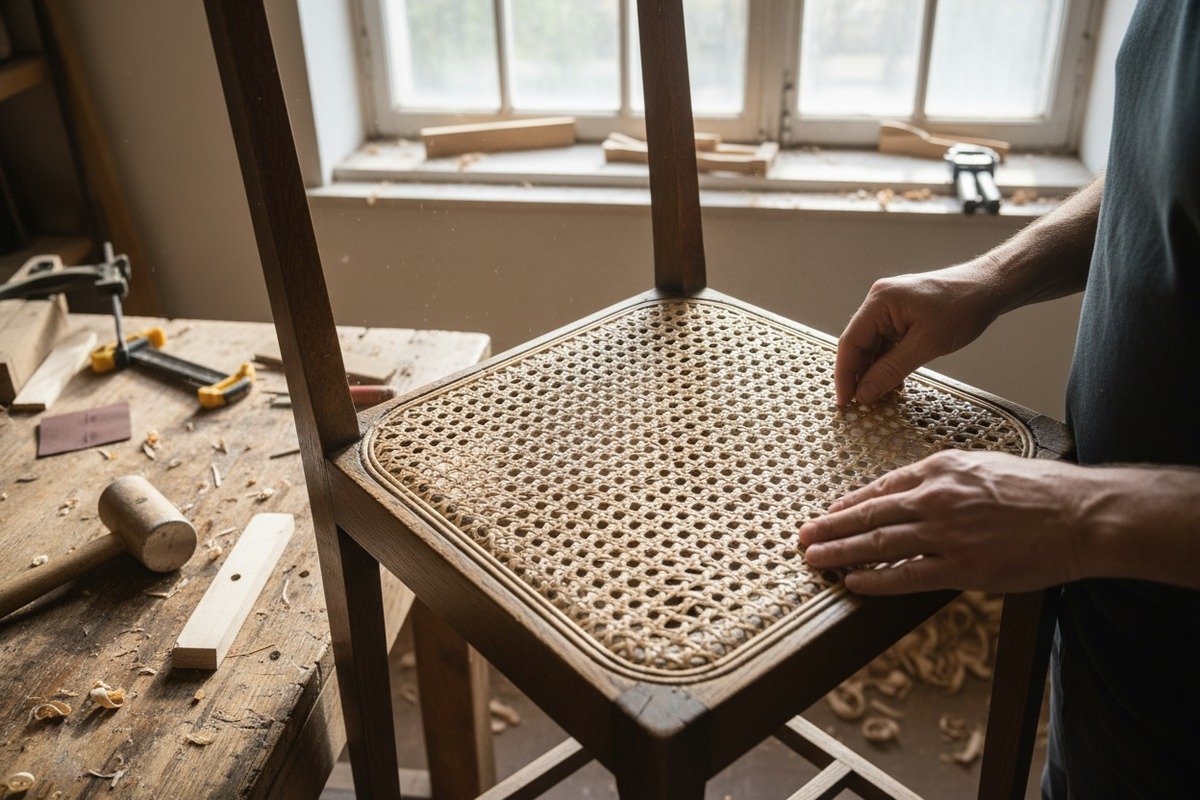
Step 3: Center the webbing. Lay the wet sheet over the seat opening. Make sure the weave pattern runs parallel to the chair's front edge. This is critical. Misaligned patterns look crooked and can cause uneven tension.
Step 4: Press into the front groove. Using a plastic spackle knife or wooden wedge, push the webbing down into the front groove. Work from the center outward. Do not stretch the webbing—just press it in.
Step 5: Press into the back groove. Pull the webbing gently toward the back to remove slack, then press it into the back groove. Again, center outward.
Step 6: Press into the side grooves. Repeat the process on both sides. Check that the weave is still square. Adjust if needed before the webbing starts to dry.
Step 7: Trim the excess. Use a sharp razor knife to cut away the extra webbing just outside the groove. Leave a tiny bit—you can trim it flush after the spline is in.
Securing With Spline and Glue
Run a thin, even line of clear-drying wood glue 8 into the groove on top of the pressed webbing. Do not use white acrylic glue—it dries opaque and makes future repairs harder.
Take the soaked spline and begin tapping it into the groove at the back center of the seat. Use a rubber mallet or hammer with a wood block to protect the spline. Tap gently and progressively. Work around the seat, pressing the spline down firmly. At corners, go slowly. The spline needs to bend around curves without cracking.
Where the spline ends meet, cut them at a 45-degree angle so they overlap neatly. Wipe away any excess glue with a damp cloth immediately.
The Drying Phase
Let the chair sit untouched for a full 24 hours. As the rattan dries, it shrinks. This shrinkage is what pulls the seat tight and taut. If you sit on the chair too soon, the wet fibers will stretch and sag permanently.
After drying, use small scissors or nippers to trim any stray fibers or "hairs" along the edges. If the spline protrudes slightly above the groove, sand it lightly with fine-grit sandpaper.
How can I identify high-quality rattan materials to ensure my furniture restoration lasts?
Processing raw rattan at our facility in Indonesia has given us a front-row seat to the difference between premium and subpar materials. We grade every batch before it ships, and the gap between Grade A and lower grades is something you can see and feel immediately.
High-quality rattan cane webbing has a uniform pale straw to warm beige color, smooth and consistent strands with minimal knots or dark spots, a flexible yet firm feel when dry, and comes from reputable suppliers who can verify the rattan species and processing method used.

Visual Indicators of Quality
The first thing to check is color consistency. Premium rattan webbing has an even, natural tone across the entire sheet. If you see dark streaks, heavy spotting, or patches of significantly different shades, that signals inconsistent processing or mixed material batches.
Next, look at the individual strands. Each strand should be smooth, uniform in width, and free of cracks or splits. Run your fingers across the surface. Quality webbing feels silky, not rough or splintery. Knots are natural in rattan, but high-grade sheets have very few, and they are small and tight.
Physical Tests You Can Do
Bend a small section of the webbing gently. Good rattan flexes without snapping. If it cracks easily when dry, the material was either over-processed, poorly stored, or harvested too late in the plant's growth cycle.
Smell the webbing. Natural rattan has a mild, earthy scent. A strong chemical odor suggests heavy bleaching or treatment with harsh chemicals that can weaken the fibers over time.
Natural vs. Synthetic: When Each Makes Sense
This is a topic we discuss often with our wholesale buyers. Natural rattan is the traditional choice. It offers authentic aesthetics, excellent flexibility for installation, and reliable shrinkage for a tight seat. However, it is susceptible to moisture damage and UV fading if used outdoors.
Synthetic rattan webbing 9, which we also supply in various earth tones and patterns, is made from durable plastic polymers. It resists weather, UV light, and humidity. But it does not shrink when drying, so installation requires a different approach. Some restorers find it harder to get a taut seat with synthetic materials.
| Feature | Natural Rattan | Synthetic Rattan |
|---|---|---|
| Appearance | Warm, organic, authentic | Mimics natural look, wider color range |
| Flexibility | Excellent when soaked | Consistent, no soaking needed |
| Shrinkage (tightening) | Yes, 10–20% on drying | No natural shrinkage |
| Durability outdoors | Poor without treatment | Excellent |
| Cost | Moderate | Moderate to high |
| Best use | Indoor furniture, vintage restoration | Outdoor chairs, high-traffic commercial use |
Supplier Red Flags
When sourcing rattan, be cautious of suppliers who cannot tell you the species of rattan used or the country of origin. Quality rattan primarily comes from Indonesia, where the climate and soil produce the best cane. Our own processing facility there allows us to control quality from harvest to finished sheet.
Ask for samples before placing a large order. Any reputable supplier will provide them. Check the sample for all the visual and physical indicators listed above. Also ask about packaging. Poor packaging during shipping causes cracking and breakage. We use rigid tubes and moisture-barrier wrapping for all our export shipments because we learned early on that damaged material on arrival destroys client trust.
If the price seems too good to be true, it usually is. Extremely cheap rattan often means thinner strands, inconsistent weave tension, or lower-grade material mixed in. For a restoration that you want to last 10 or more years, the difference in cost between Grade A and Grade B is small compared to the difference in longevity.
What are the best methods for me to finish and protect my newly refurbished rattan chair?
After spending a full day guiding one of our Australian wholesale clients through a restoration demo over video call, the finishing step was where he almost went wrong. He grabbed a can of polyurethane spray. That would have sealed the rattan so tightly it could not breathe, leading to cracking within a year.
The best methods to finish and protect a refurbished rattan chair include applying a light coat of natural oil such as linseed or tung oil to nourish the fibers, using a low-VOC clear sealant for moderate protection, or leaving it natural with periodic damp-cloth cleaning. Always stain the spline to match the chair frame for a seamless look.

Choosing the Right Finish for the Cane
Rattan is a natural fiber. It needs to breathe. Heavy coatings like thick polyurethane or lacquer trap moisture inside the fibers, which causes them to swell, crack, and deteriorate faster. Light, penetrating finishes work best.
Linseed oil 10 is a popular and effective choice. It soaks into the fibers, adds a subtle warm glow, and provides basic moisture resistance. Apply it with a soft cloth, let it sit for 15 minutes, then wipe off the excess. One or two coats are plenty.
Tung oil is another excellent option. It dries harder than linseed oil and offers slightly better water resistance. It is a good choice for dining chairs that might encounter spills.
For those who want a completely natural look with no finish at all, that works too. Unfinished rattan ages gracefully, developing a warm patina over time. Just wipe it down with a damp cloth every few weeks to remove dust and prevent the fibers from drying out.
Finishing the Chair Frame
Before you address the cane, inspect the wooden frame. Sand any rough spots with 120-grit, then 220-grit sandpaper. Fill small cracks or chips with wood filler and let it dry completely.
For the frame finish, you have several options:
- Natural oil finish: Same linseed or tung oil. Preserves the wood grain beautifully. Eco-friendly.
- Low-VOC paint: Good for a modern, refreshed look. Choose matte or satin for a furniture-appropriate sheen.
- Stain and clear coat: Match the original color or go darker for a contemporary vibe. Use a water-based polyurethane for the topcoat—it is lower in VOCs and dries clear.
Staining the Spline
This small detail makes a big difference. The reed spline often comes in a lighter color than the chair frame. A quick wipe of wood stain matched to the frame color helps the spline disappear visually into the groove, giving the finished chair a professional, seamless appearance.
Use a small brush or cotton swab to apply stain to the spline only. Be careful not to stain the webbing unless you intentionally want a colored cane look.
Long-Term Care and Maintenance
A properly finished rattan chair can last decades. Here are the care basics:
- Keep the chair out of direct sunlight for extended periods. UV light fades and weakens natural rattan.
- Avoid placing the chair in very humid or very dry rooms. Extreme moisture conditions cause swelling or cracking.
- Clean with a soft, slightly damp cloth. Never use harsh chemical cleaners.
- Re-oil the cane once a year with a thin coat of linseed or tung oil to keep fibers supple.
- If the seat starts to sag slightly over time, flip the chair upside down and mist the underside of the cane with water. Let it dry. The fibers will re-tighten.
Creative Finishing Ideas
Some of our clients in Spain and the Netherlands have been dyeing cane webbing in muted tones—sage green, dusty pink, charcoal—before installation for a custom, contemporary look. This trend has exploded on Instagram and TikTok. If you want to try it, use fabric dye diluted in the soaking water. The cane absorbs the color evenly. Test on a small piece first to confirm the shade.
Two-tone designs are also popular. Paint the chair frame in a bold color and leave the cane natural. The contrast creates a striking visual that works in modern and eclectic interiors alike.
Conclusion
Refurbishing an old chair with rattan cane webbing is a rewarding weekend project that saves furniture from landfills and gives your space genuine character. Measure carefully, soak properly, install patiently, and finish lightly—your restored chair will serve you for years.
Footnotes
1. Explains what cane webbing is and how it’s produced. ↩︎
2. Direct replacement from the original manufacturer (Knoll) with a working URL and relevant content. ↩︎
3. Explains what reed spline is and its role in securing cane webbing. ↩︎
4. Provides a clear explanation of rattan grading, including Grade A quality. ↩︎
5. Differentiates between open mesh and close weave patterns in rattan. ↩︎
6. Describes the key characteristics of mid-century modern furniture design. ↩︎
7. Explains the types and properties of natural textile fibers. ↩︎
8. Offers a specific product known for drying clear and strong. ↩︎
9. Provides a detailed guide on synthetic rattan webbing, its properties, and uses. ↩︎
10. Direct replacement from the original domain (Vermont Woods Studios) with a working URL and relevant content. ↩︎

