Years of running our rattan processing facility in Indonesia and shipping rolls to furniture factories worldwide have taught us one clear lesson: most cutting mistakes happen before the blade ever touches the material self-healing mat 1. Whether you are restoring a mid-century chair 2 or building custom radiator covers, a bad cut means wasted webbing, frayed edges, and frustration.
To properly cut rattan cane webbing, soak it in warm water for 30 to 60 minutes first, then use sharp scissors or a utility knife to cut along the weave direction. Always cut oversized by 2 to 4 inches, secure the webbing into the frame, and trim the excess flush after installation.
Below, we break down the exact tools, soaking methods, measuring techniques, and finishing steps you need to get a clean, professional cut every single time. Let’s start with the tools.
What are the best tools I should use to cut rattan cane webbing cleanly?
When we pack orders for our wholesale clients in the Netherlands and Australia, we always include a short cutting guide because the wrong tool is the number one reason for ruined webbing. Dull blades crush fibers instead of slicing them, and the result is a messy, fraying edge that no amount of glue can fix.
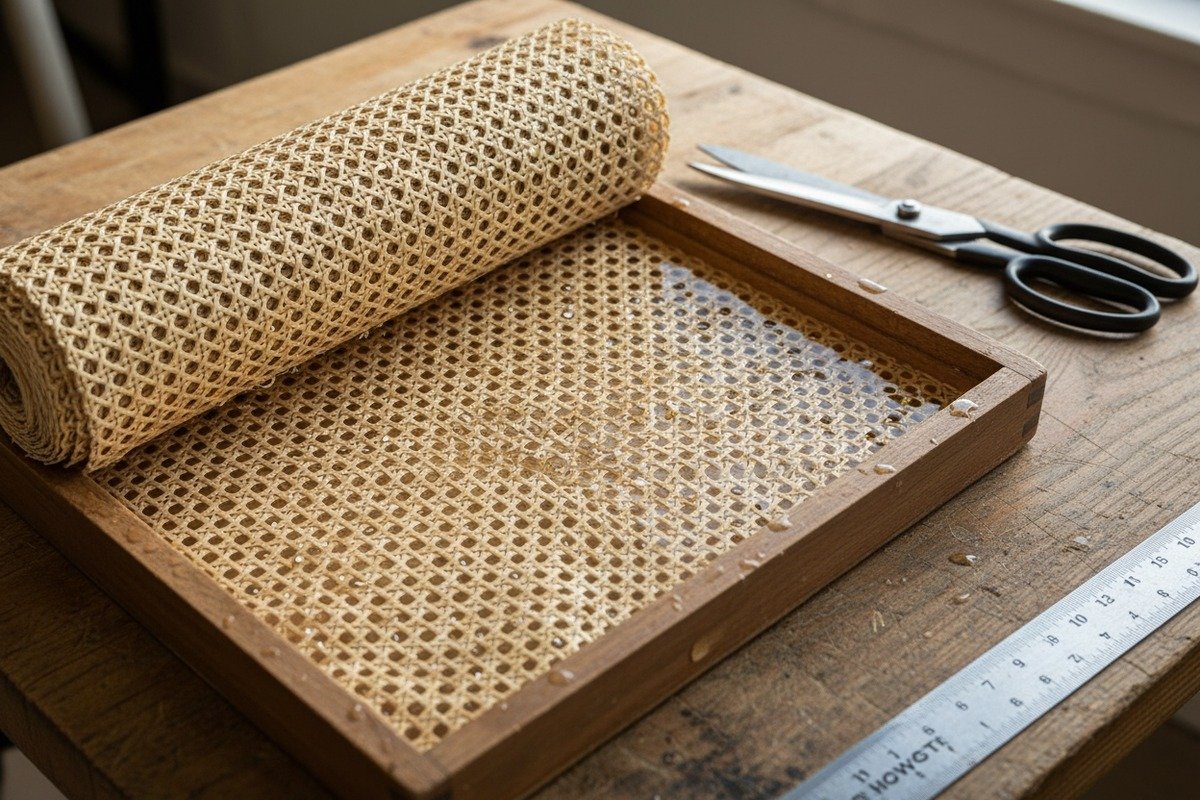
The best tools for cutting rattan cane webbing cleanly are sharp scissors for straight sizing cuts, a new utility knife or razor blade for trimming flush against frames, and a rotary cutter with a self-healing mat for long, precise straight lines on larger sheets.

Sharp Scissors: The Everyday Go-To
For most DIY projects, a pair of heavy-duty fabric scissors does the job. The key word here is "sharp." A dull pair will pinch the rattan strands instead of cutting through them. This pinching crushes the fiber ends, which causes them to split and fray within days.
We recommend dedicated craft scissors with at least 8-inch blades. Longer blades let you complete a cut in fewer strokes, which means fewer chances for the weave to shift mid-cut. If you are cutting natural rattan cane webbing 3 — the kind with a warm beige, straw-yellow tone and organic fiber variations — scissors handle the classic hexagonal open-mesh "radio weave" pattern 4 very well.
Utility Knives and Razor Blades: For Flush Trimming
After you install webbing into a groove-and-spline frame 5, you need to trim the excess. This is where a brand-new razor blade or a sharp utility knife shines. Angle the blade slightly outward, away from the spline, and run it along the groove edge. Cutting inward is a common mistake. It shortens the webbing below the groove lip and loosens the fit.
At our Foshan facility, we test different blade types on each new batch of webbing. We have found that single-edge industrial razor blades give the cleanest trim, especially on the dense square basketweave and diamond motif patterns.
Rotary Cutters: For Large Panels
If you are working on a project like a full door insert or a series of cabinet panels, a rotary cutter 6 paired with a metal straightedge and a self-healing cutting mat is the fastest route to clean, straight lines. The rolling action slices through rattan strands without dragging or snagging.
Tool Comparison Table
| Tool | Best Use | Precision Level | Cost Range | Skill Level |
|---|---|---|---|---|
| Sharp scissors (8"+) | General sizing cuts | Medium | $10–$25 | Beginner |
| Utility knife / razor blade | Flush trimming after install | High | $3–$8 | Beginner–Intermediate |
| Rotary cutter + mat | Long straight cuts on large sheets | Very High | $15–$35 | Intermediate |
| Shears / tin snips | Angled or 45-degree corner cuts | Medium | $12–$20 | Intermediate |
| Chisel (sharp, narrow) | Final flush peel-and-trim | High | $10–$15 | Advanced |
| Professional laser cutter | Repetitive precision cuts, sealed edges | Extremely High | Service-based | Professional |
A Note on Power Tools
Some professionals use router tables to cut precise grooves into frames before installing webbing. The router itself does not cut the webbing, but a clean groove (typically 5/16-inch wide and deep) ensures the spline seats tightly. This gives you a solid edge to trim against. For the webbing itself, though, hand tools are almost always enough. Power saws can work for intricate shapes, but they demand a steady hand and eye protection.
Cutting Synthetic vs. Natural Rattan
Our product range includes both natural cane webbing and synthetic rattan matting 7 with chevron or wave designs. Synthetic rattan is a durable plastic that mimics natural fibers. It cuts differently. You can use the same tools, but you do not need to soak synthetic webbing. A sharp utility knife and a straightedge handle synthetic material cleanly. Natural rattan, however, benefits greatly from soaking — which brings us to the next section.
How can I prevent my rattan webbing from fraying or unraveling after I cut it?
One of the most common complaints we hear from purchasing managers — clients like our partners in Thailand and Turkey — is that the webbing edges fray after cutting. This is not a material defect. It is almost always a technique issue. Once you understand why rattan frays, preventing it becomes straightforward.
To prevent rattan webbing from fraying after cutting, always cut along the warp or weft threads rather than diagonally, use a sharp blade, and immediately secure the cut edges by tucking them into a groove, applying wood glue, or binding them with spline or tape before the fibers dry and spring apart.

Why Does Rattan Fray?
Rattan cane webbing is made of interwoven natural strands. When you cut across these strands, the tension that held the weave together releases. The loose ends have nothing to grip, so they curl and separate. Diagonal cuts are the worst offenders because they sever strands at odd angles, leaving longer exposed tails that unravel easily.
Cut Direction Matters
Always pay attention to the weave direction. Rattan webbing has warp threads (running lengthwise) and weft threads (running widthwise). warp or weft threads 8 Cutting parallel to either set of threads produces the cleanest, most stable edge. When you must cut at an angle — say, for a trapezoid-shaped panel — plan to hide or secure that edge immediately.
Immediate Edge Securing Methods
Here are the most reliable ways to lock down a freshly cut edge:
| Method | How It Works | Durability | Best For |
|---|---|---|---|
| Groove + spline | Tuck cut edge into routed groove, tap spline in with mallet | Excellent | Chair seats, frame panels |
| Wood glue (thin bead) | Apply along cut edge, let dry | Good | Decorative panels, cabinet inserts |
| Clear craft glue | Brush onto cut strands, press flat | Moderate | Small projects, quick fixes |
| Binding cane wrap | Wrap a thin binding cane strip around the edge | Excellent | Traditional woven seat repairs |
| Stapling | Fold edge under, staple to frame back | Good | Modern panels, radiator covers |
| Masking tape (temporary) | Tape along planned cut line before cutting | Temporary only | Pre-cut stabilization |
The Tape-Before-You-Cut Trick
This is a technique we share with every new client. Before you make your cut, lay a strip of painter's tape or masking tape along the planned cut line on both sides of the webbing. Then cut right through the tape. The tape holds the strands in place during and after the cut, giving you time to secure the edge properly. Peel the tape off after installation.
Glue Application Tips
If you choose to glue the edge, use a thin, even bead. Too much glue creates a visible ridge that looks unprofessional. For our bleached rattan cane webbing, which has a lighter, more refined appearance, a clear-drying craft glue works best. Apply it with a small brush, press the strands flat with a clean cloth, and let it dry for at least two hours.
Long-Term Durability
The spline-and-groove method remains the gold standard for durability. When we prepare sample kits for furniture factories, we always demonstrate this method. The spline compresses the webbing edge inside the groove, locking every strand in place. After 1 to 2 days of drying while clamped, that edge is not going anywhere.
Stapling is faster and works well for modern panel projects, but staples can loosen over time, especially on pieces that see regular use. If you staple, add a thin line of glue underneath the fold for extra security.
Should I soak my rattan cane webbing before I make my first cut?
Through decades of processing raw rattan at our facility in Indonesia, we have seen the difference soaking makes firsthand. Dry rattan is rigid and brittle. Wet rattan is flexible and forgiving. But soaking is not a one-size-fits-all step, and doing it wrong can cause problems too.
Yes, you should soak natural rattan cane webbing in warm water for 30 to 60 minutes before cutting. Soaking softens the fibers, makes them pliable, and significantly reduces the risk of cracking or splitting during cutting and installation. Do not soak synthetic rattan webbing — it does not absorb water.

How Soaking Works
Natural rattan fibers contain cellulose and lignin 9, similar to wood. When dry, these fibers are stiff and prone to snapping under stress. Warm water penetrates the fiber walls and temporarily softens them. This makes the webbing easier to bend around curves, press into grooves, and cut without shattering the strand ends.
Soaking Time and Temperature
The standard recommendation across the industry is 30 minutes in warm water. But there are nuances.
| Webbing Type | Recommended Soak Time | Water Temperature | Notes |
|---|---|---|---|
| Natural open-mesh (radio weave) | 30 minutes | Warm (not hot) | Thinner strands absorb quickly |
| Natural dense basketweave | 45–60 minutes | Warm | Thicker weave needs more time |
| Natural diamond motif | 30–45 minutes | Warm | Medium density |
| Bleached rattan cane webbing | 20–30 minutes | Lukewarm | Bleaching weakens fibers slightly; avoid over-soaking |
| Synthetic rattan matting | Do not soak | N/A | Plastic does not absorb water |
Over-Soaking Risks
More is not always better. If you soak natural rattan for several hours or use hot water, you risk weakening the fibers. Over-soaked rattan becomes too soft and stretchy. When it dries after installation, it can shrink excessively and pull away from the frame or sag in the center. We have seen this happen with clients who left webbing soaking overnight. The result was a loose, wavy seat that needed to be redone.
A good rule: if the webbing feels pliable enough to bend easily around your finger without resisting, it is ready. Pull it out, shake off excess water, and work with it immediately.
Soaking Setup
You do not need special equipment. A bathtub, a large plastic storage bin, or even a clean kitchen sink works. Lay the webbing flat in the container and cover it with warm water. If the piece is too large to submerge fully, roll it loosely and rotate it halfway through the soak time to ensure even absorption.
What About Misting Instead of Soaking?
Some guides suggest misting rattan with a spray bottle instead of full soaking. In our experience, misting works for very minor adjustments — like softening a small area before a single trim cut. But for full installation cuts where the webbing needs to wrap into grooves, misting does not penetrate deeply enough. The surface feels soft, but the core remains brittle. Full soaking is always safer for any project involving more than a quick trim.
The Shiny Side Rule
After soaking, lay the webbing with the shiny side facing up. The shiny side is the outer bark of the rattan, which is smoother and more durable. This side should face outward on your finished project. It also gives you a better visual reference for marking and cutting.
How do I measure and mark my rattan webbing to ensure I get the most accurate cut?
We ship rattan webbing by the meter to clients across more than a dozen countries, and one of the first questions new buyers ask is how much overage to order. The answer depends entirely on how carefully you measure and mark before cutting. A precise measurement saves material, saves time, and saves money — especially when you are purchasing premium Grade A rolls.
To measure and mark rattan webbing accurately, first measure the inner dimensions of your frame or groove channel, then add 2 to 4 inches of overage on all sides. Mark the cut line on the webbing using a soft pencil or chalk, aligning your marks with the warp or weft threads for the straightest possible cut.

Step 1: Measure the Frame First
Before you unroll any webbing, measure the opening you need to fill. For groove-and-spline installations, measure the inside edge of the groove on all four sides. For staple-on installations, measure the outer edge of the frame where the webbing will wrap around.
Use a rigid tape measure 10, not a flexible cloth one. Cloth tape measures can stretch and introduce small errors that add up on larger panels.
Step 2: Add Overage
Never cut rattan webbing to the exact size of your opening. You need extra material to grip, tuck, or press into grooves. The standard overage is 2 to 4 inches on each side. For beginners, go with 4 inches. For experienced hands, 2 inches is enough.
Step 3: Transfer Measurements to the Webbing
Lay the webbing flat on a clean, hard surface — a large table or a floor covered with a cutting mat. Use a soft pencil, tailor's chalk, or a washable fabric marker to mark your cut lines. Avoid permanent markers, which can bleed into the fibers and leave visible stains on the finished piece.
Step 4: Align with the Weave
This step is critical. Look at the weave pattern and align your cut line with the nearest warp or weft thread. Even if your frame measurement does not fall perfectly on a thread line, shifting your cut by 1 to 2 millimeters to match the weave will give you a dramatically cleaner edge. Cutting between threads — rather than through their midpoints — reduces fraying.
Step 5: Use a Straightedge
For straight cuts, clamp a metal ruler or a long straightedge along your marked line. This guides your scissors, rotary cutter, or utility knife and prevents wandering. For curved cuts or irregular shapes, create a cardboard template first. Trace the template onto the webbing, then cut along the traced line.
Template Method for Complex Shapes
If your project involves arched door panels, circular inserts, or any non-rectangular shape, a template is essential. Cut the template from stiff cardboard or poster board. Test-fit it in the frame. Adjust as needed. Then lay it on the soaked webbing, trace around it with chalk, and cut with sharp scissors. This method virtually eliminates waste and ensures the webbing fits on the first try.
Common Measuring Mistakes
Here are the pitfalls we see most often:
- Measuring the outside of the frame instead of the groove or opening. This gives you a piece that is too large and wastes material during trimming.
- Forgetting overage on one side. Especially common on rectangular pieces where you measure two sides and forget the other two.
- Measuring after soaking. Wet rattan stretches slightly. Always measure and mark on dry webbing, then soak. The slight expansion during soaking actually works in your favor, giving a bit more material to work with.
- Using a pen that stains. Test your marking tool on a scrap piece first.
Measurement Quick Reference
| Frame Opening Size | Overage Per Side | Total Webbing Size to Cut |
|---|---|---|
| 12" × 12" | 2" | 16" × 16" |
| 18" × 24" | 3" | 24" × 30" |
| 24" × 36" | 3" | 30" × 42" |
| Custom curved shape | 4" | Template + 4" border |
Final Check Before Cutting
Lay the marked webbing over the frame one more time. Confirm that your marked lines fall outside the groove or attachment area on all sides. Once you are confident, apply the tape-before-you-cut trick from the earlier section, and make your cut. A few extra seconds of checking here can save an entire sheet of webbing.
Conclusion
Cutting rattan cane webbing well comes down to four things: the right tools, proper soaking, precise measuring, and immediate edge securing. Follow these steps, and every cut will be clean and lasting.
Footnotes
1. Wikipedia’s article on cutting mats explains self-healing properties and their function. ↩︎
2. Wikipedia provides an authoritative and comprehensive overview of mid-century modern design, which includes furniture like chairs. ↩︎
3. Offers a comprehensive explanation of what rattan cane webbing is and its origins. ↩︎
4. Describes the characteristics and appearance of the specific radio weave pattern in rattan cane. ↩︎
5. Defines and explains the concept of a spline joint in woodworking applications. ↩︎
6. Wikipedia offers a concise and authoritative explanation of what a rotary cutter is and its uses. ↩︎
7. Wikipedia’s article on synthetic fibers provides an authoritative overview of materials used to create synthetic products like rattan. ↩︎
8. Defines and differentiates between warp and weft threads in the context of weaving textiles. ↩︎
9. Wikipedia’s article on lignocellulose comprehensively explains both cellulose and lignin, their composition, and their relationship. ↩︎
10. Wikipedia’s article on tape measures describes different types, including rigid ones, and their characteristics. ↩︎

